Since my last posting I've done a fair bit of work on the boat. A lot of that was sanding the hull and deck. I opted to go with hand sanding as I didn't want dust to be going everywhere. Granted it did so even when hand sanding but it was a bit more controlled. It took about 4 nights of sanding to get the hull down to a reasonable finish. I'm down to the 150 -220 grit level now to make sure that all glass edges are feathered and any hump/lump/bumps are gone!!
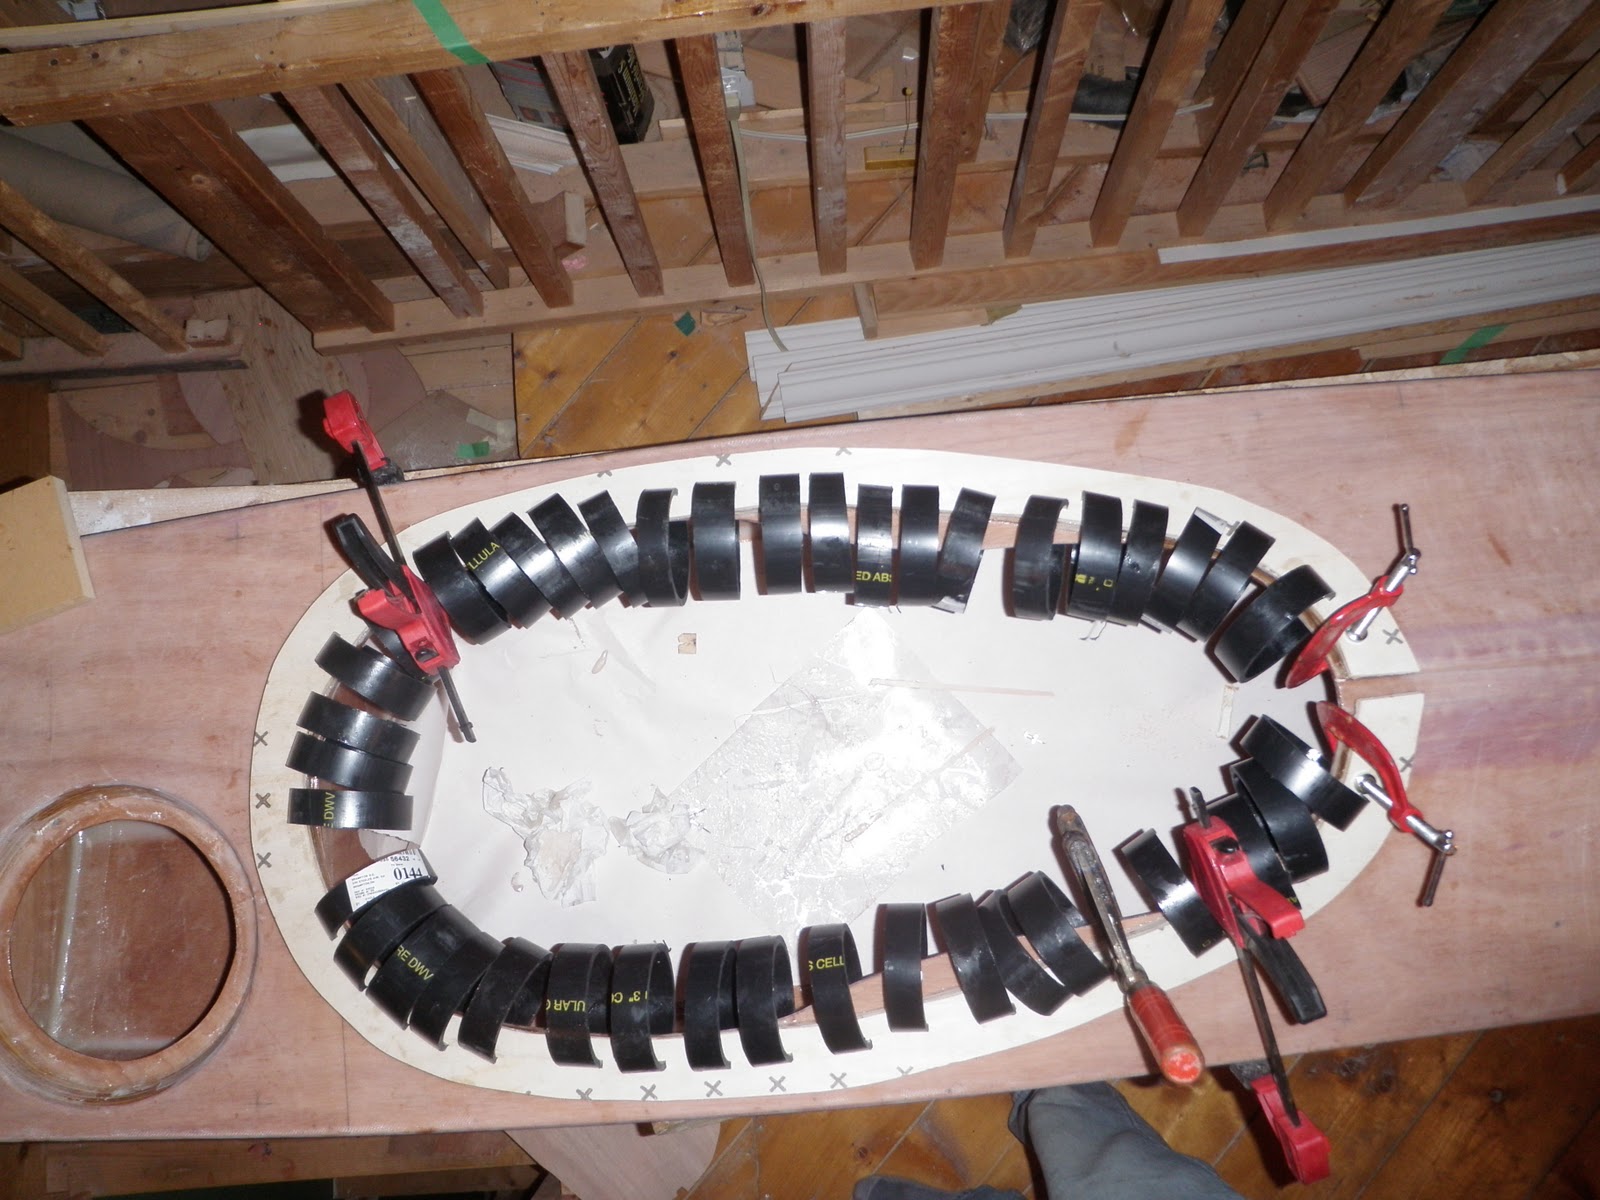
With the semi-final sanding complete, the next task was the cockpit coaming. The plans call for a 3/4" plywood spacer that is 3/4" wide. Using a template, I simply cut the spacer from 3/4" exterior grade fir plywood. I used the Schedule 40 clamps to hold it in place while the epoxy set.
 |
| Clamps, clamps, clamps . . |
 |
| and more clamps |
There's an old adage "measure twice, cut once" I'd like to revamp this by saying "read many times, cut once" I'm positive that the instructions said to cut the coaming lip to 1 1/4" width. So I cut the lip to that size and epoxied and clamped it to the spacer. I sat back to admire my handiwork and browse the instructions one more time. Well, I'll be damed if those instructions didn't say 1 3/4" for the lip.Time to panic. Luckily the epoxy was not near set so I just pulled the lip off. Also luckily I had a piece of 1/4" subfloor plywood kicking around (I just used my last piece of 4mm marine play and had nothing big enough to make a new lip). In 15 minutes or less I had the new lip cut and epoxied in place - phewww. Yet another bullet dodged!!
 |
| Here's lip #2 being glued using Schedule 40 clamps! |
 |
| Gluing the lip! |
I purposely left the lip a bit wide so that I could be bit more careful on the final trimming. Below is a handy little device I came up with to make sure that had the lip the same width/shape all the way around.
I used a combination of Shur-form, small block plane and sandpaper (ohhhh, the amount of sandpaper being used in this project!!!) to get the lip into shape!
 |
| Using the Shur-Form |
Oddly enough, it seems that I've made my cockpit about 2" longer than I had originally intended (16"x32" as opposed to 16"x30"). This is no biggie as I'm 6'3" 211 pounds and not as limber as I used to be. I can slip in and out of the cockpit quite comfortably. The only problem is that the longer cockpit with a 1 3/4" wide lip makes for a BIG sprayskirt. Unfortunately my Shocker 1.4 ain't gonna cut the mustard. I tried a 1.7 nylon skirt I had but it too was too tight. I decided to cut back the lip and you guessed it - almost right back to the size of the one I ripped off the night before!!
The next day I picked up a new 1.7 Shocker. After a little more work on the lip, it fits like a charm!! Sorry no shots of the skirt in place but I'm sure you can get a mental image! For those wondering, the smaller lip holds the skirt with great tenacity. I'm actually a little intimidated by the grip but I'm sure I'll get used to it.
I really like the seat in my Baffin. It has a raised front that puts your thighs in a slightly elevated position. I decided that I'd try to replicate this seat in foam. I went to the basement and pulled the seat out of the Baffin so it would be easier to work with. Just for sh!ts and giggles I decided to drop the seat in the new boat to see how it fit. Well, I'll be damned if that thing didn't fit just PERFECT! With a little twisting it just shoe horned right in!! The hip plates/hangers snugged up just under the coaming and the base of the seat matched the hull shape ever so sweetly!! Problem solved - I ain't going through the hassle of making a new seat. I'll just see if Boreal Designs will sell me one. Already got the email sent off to them. In the meantime, the Baffin will remain sans seat!!
I will be replacing the backband with a solid foam pillar that will give a little suppurt just to centre part of my lower back.
 |
| Lip/coaming epoxied, seat in place. |
 |
| Profile of coaming. |
 |
| Looking fwd from day hatch. |
 |
| A very neat fit!! Backband is just hanging there for now. Don't be deceived by the camera angle - it makes the cockpit look asymmetrical. |
 |
| Looking aft from front hatch. |
 |
| Hatches laid in place. |
 |
| Looking aft. |
With the seat taken care of (for now), the things left on the "to do" list are - sand and epoxy the coaming a few more times - do some more sanding on the deck/hull - fasten in the hatches - devise the thigh braces (already got some good ideas) - paint the whole thing and then affix the deck rigging. Certainly not big tasks when you consider what I've gone through these past two months!!
Thanks for dropping by!!