Sunday, April 8, 2012

Black Pearl Project - Glassing the Coaming and Deck

So here's the week in review. In my last post, I had the coaming roughed in. The next step was to trim it down to the right height - 3/4" -  and sand it down. In the pictures below you will see the deck sanded as well.


Coaming trimmed and sanded.

From the aft - showing Bomar deck plate.

I decided to go with a full glass cockpit riser and lip using the wood as a base. I used 1/2" polystyrene foam  Home Depot as the mold.


Foam tacked in place with hot melt glue.
 To make the first layer of glass easy to fit, I went with short pieces run vertically.


Vertical glass!

 I used pigmented epoxy on the coaming.


Glass wetted out.

After the first layer of glass epoxy. Excess not trimmed.


After three layers, the excess was trimmed. A light sanding as well.

After 10 layers of glass and epoxy, I determined the whole unit was stiff enough. I feel compelled to point out that in the middle of this job there was a potentially "fatal" hiccup to the whole thing but it all worked out in the end. (Thank gawd that golden horsehoe is still firmly in place) In a nutshell I wanted to round the coaming but decided to do so AFTER I had three layers of glass down. A careful rounding using a rasp would have been more prudent but in my haste, I took a saw and proceeded to hack away - rather crudely, I must add!!. It was looking pretty grim for a while but it actually worked out very nice!!  I now have a nicely shaped, i.e., rounded, lip on my cockpit rim!!

Between the jigs and reels, the coaming took me from Sunday to Thursday to complete. With the coaming done, I did the final sanding on the deck in anticipation of glassing.

I almost had second thoughts about the Black Pearl being All-Black Pearl at this point. Seeing the deck all sanded and contrasting so nicely against the black hull, I almost decided to leave the deck "au natural". Discussions with Cheryl ensued. Cheryl loves the look of the wood and suggested that if I left the deck unpainted, at least people would know that the boat was a stripper!! I was not entirely convinced. Read on to see the verdict . . .


Cockpit coaming with foam removed.

Foredeck sanded.

Sanded deck ready for glass.

Good Friday was the day for glassing the deck. I laid the glass on the deck and the Shroud of Turin immediately sprang to mind. If I lifted the glass would the image of my boat be forever seen on it??  I waited for the lightening bolt to strike me dead!!


The Shroud of Paradise


The Shroud of Paradise - foredeck!

I made my final decision and the images below show the outcome. The Black Pearl will be just that -a full-on   black boat!!

The "Oreo" boat!!!

The All-Black Pearl!!

I've now got three coats of pigmented epoxy on and after one more will determine whether the boat is ready for sanding.

Thanks for dropping by,

Sean

Saturday, March 31, 2012

Black Pearl Project - And the Two Shall Become One

In my last post, the deck was getting close to being ready to mate to the hull. There were two potential problem spots with regards to the the two bulkheads in this boat. The aft bulkhead (right behind the cockpit) was fine but I needed to make sure that the deck "conformed" to the right shape, i.e., was good and flat!!  The fwd bulkhead is to serve as my foot brace but due to the very cramped space,  it  is quite far forward in the boat. So far that I could not reach it via the cockpit. Also, running a fillet on the fwd side of the bulkhead was not an option as it was butting right up against the fwd hatch/deck plate!! This meant needing a substantial gluing surface between these two bulkheads and the deck to negate the need for a fillet.  Simply, I beefed up both these bulkheads by adding a piece of 3/4" x3/4" piece of pine to the aft and  12mm ply to the fwd!! Both of these increased the gluing surface substantially. Clear as mud??


Under deck prior to mating.  Fittings given a coat of epoxy for "good measure"

You can see the 12mm plywood (white) on the footbrace  to provide  better adhesion to the deck. Upper deck  off to the side .
I mixed up some  thickened epoxy and spread it along the sheer clamp/hull. I figured it was better to go thick and have the excess squeeze out rather than have a starved join. There was some excess but not a whole lot - so I am happy with the join.

For the areas that required extra "force", i.e., on the foot brace and fwd of the cockpit, I used tie down straps to get the extra clamping force. Otherwise, packing tape was sufficient to get a tight join! Phew!!!


Aft of the cockpit has been presenting itself as a PITA (pain in the ass) since I initially planked the deck!! With the extra brace (3/4 x 3/4) epoxied to the bulkhead, I had some leverage!!  When the time came to epoxy the deck to the aft bulkhead, I used an exterior brace. (See below) It was screwed to the aft bulkhead with 2" screws that effectively pulled the deck tightly to to the bulkhead. The copious amounts of thickened epoxy ensured a tight fit!!

Temporary brace keeping the aft deck flat!
 A bright LED flashlight was used to find gaps in the joins. All looks good and tight!!


Aft looking fwd.

Coaming waiting to be trimmed!!
My apologies for the rambling entry. I am covered in black epoxy. I thought this task would take about an hour but it stretched into three!!!    I've had a few drinks of Jameson's on the rocks. So I'm just wanting to relax !!

Thanks for dropping by,

Sean

Sunday, March 25, 2012

Black Pearl Project - Hatching, Matching . . .

Friday evening - 7:30 to 10:30:

With the "roughing in" of the fittings completed, I figured I might as well continue on with other deck-related projects. Time to to work on the hatches, a.k.a., deck plates!!

Now I know why I ran two strips up either side of the centre line on the boat - to give a full-length centre line of the boat!! Simply align the bolt-down holes on the deck plate between these two strips and you automatically have it centred!! Yeehaa!!

Using Gorilla Tape I held the plate in place while I ran a 1/2" perimeter mark.


Plate held in place for marking.

Next thing to do was drag out the jig saw and cut the deck. I remember being apprehensive about doing this last year with the Point Bennett but this time it was like "OK, I got the lines marked so let's cut this sucker!!!"

Cutting was uneventful - thankfully!

Next I cut a baseplate of 4mm marine plywood (the last remnants of my S&G build). I tacked the baseplate with the glue gun. Had a beer to bolster my courage!!

Tacked in place!

And proceeded to fill in the gaps - using scrap strips!

Filling in the gaps!!

After about 1 hr of cutting and gluing, I had the deck plate cased in. The last piece fit in without any trimming at all. A good omen!!

Nary the bit of trimmin' required!!

The front hatch recess - in the rough!!

In the rough #2.

With the front roughed in, why not tackle the rear?  The rear hatch is on the perfectly flat back deck so there is no need of recessing - other  than  a simple plywood spacer to drop the level of the deck plate to the level of the deck!! Easy peasy!!

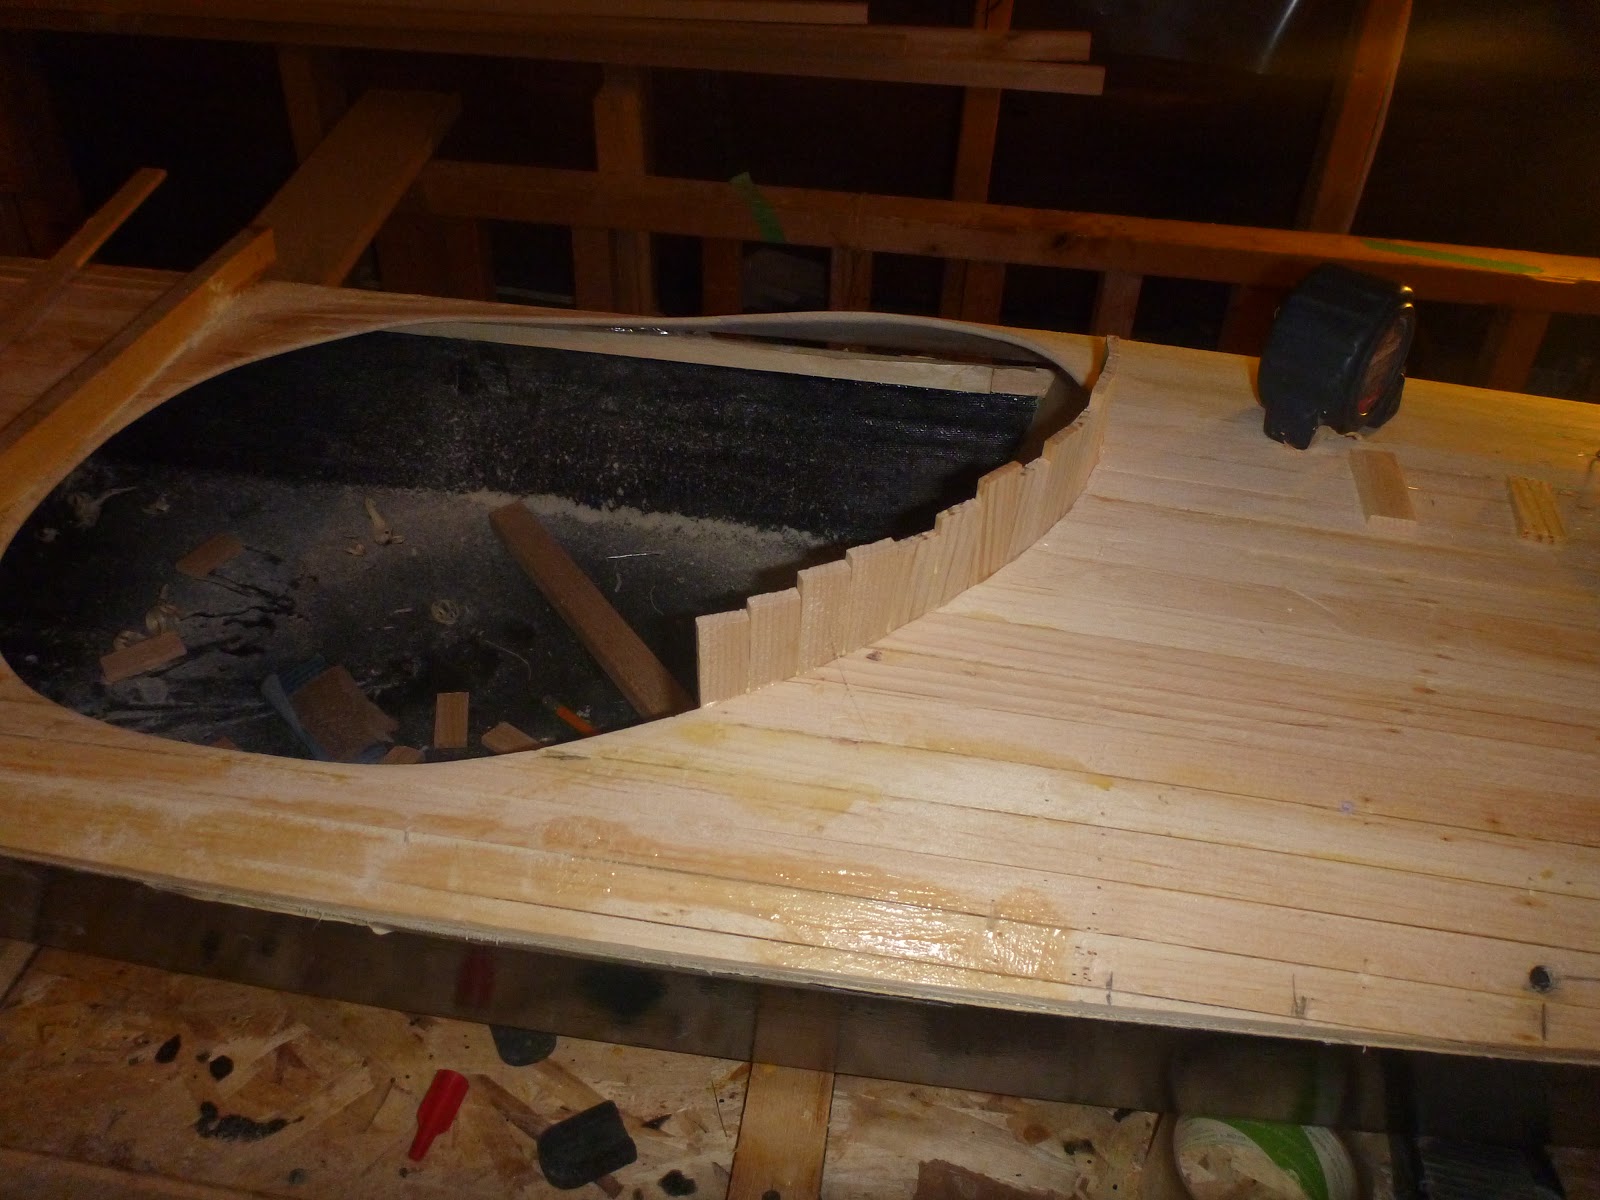
Just mark the hole, take the jigsaw and cut!! This gets easier every time!!

Hole cut!!

Spacer tacked in place. Looks good.

Two hatches in place in an evening's work is fine by me,

On Saturday AM. I ran a fillet of epoxy around the underside of the hatch. Sorry no pictures!

Saturday 7:00 to 9:00

Saturday evening I decided to tackle the cockpit coaming. I've decided to go with the wood/glass hybrid so the first job is to create the wooden riser!! I used scrap pine strips.

The strips were affixed to the deck via hot glue and bonded  together with wood glue. The system worked great and in less than two hours I had the riser completed. Not bad for two hours work!! Left enough time to watch an NBA  game on TV with my son. Nice to be back "in the land of the living" as they say!!!

Let the games begin . . .

. . . .  and finish!!!

Afterwards, I took a few shots of the boat as it now looks.


Front hatch - sanded and ready for glass!

Starboard aft shot. Hatches laid in place. Riser in place but not trimmed.

Starboard bow. Looks good to me!!

I'm into the nitty gritty work so things will appear to slow down. But every bit of work completed is one step closer to the launch of the Black Pearl!!

Thanks for dropping by.

Sean


Wednesday, March 21, 2012

Black Pearl Project - Variation on the Maroske Tube Fittings


Perhaps one of the cleanest of deck fittings are ones often called the Maroske tube fittings. The idea is to have a short fibreglass tube under the deck through which the deck lines can run. There are a number of different ways of accomplishing this but I decided to try something that I've yet to see done.

I could compare my method with others but, instead, I am just going to describe what I did. 

I used windshield washer tubing. This tubing is pretty thick. The inside diameter was just the right thickness through which to fit a medium gauge wire. The thick walls combined with the wire prevent the tubing from collapsing upon itself when you bend it.  The wire has the added bonus of holding a tighter radius.

To prevent the epoxy from sticking to the tube, I wrapped it in teflon tape. The problem of having the tube stuck permanently is a very real possibility so I figured the teflon tape would be added insurance against this  happening.

Tubing, tape and wire.

Tubing wrapped in teflon tape and test fitted in a piece of masonite.

The first fittings I wanted to try were the ones for the paddle park on the front deck. This is simply two sets of fittings on either side of the bow. A good place to start.


Holes drilled in the deck and tubes fitted. View from underside of the deck.

The norm is to use fibreglass and epoxy to wrap the tube. I decided to simply use glass reinforced polyester resin - a la the automotive section of Canadian Tire. The stuff I bought has the long strand fibreglass - great for filling larger holes. When you take it out of the tin, it looks like a mat of hair and green goo!! This stuff dries very hard, very quick and waterproof. Who could ask for more? The only problem is that, unlike epoxy, this stuff really smells!! I would not want to spend too much time working on it without proper breathing equipment.

Bondo-Hair??? What an odd name - but certainly appropriate!!

You simply take a scoop of this stuff, add a bit of the cream hardener and mix it up. Unlike epoxy, there's no need for crucial measurements and it's hard to screw up!! Although too much hardener can result in a very quick setup time which also means a buildup of heat. Be careful!!

I worked the mixture in around the tubes and then built up a sufficient layer to cover the top and sides. I started working the mixture with a stick but it was adhering to the wood and making it hard to get a smooth finish. I figured that a piece of plastic wrap would allow me to better work the mixture and get a good shape. Worked like a charm. And of course, plastic wrap does not stick to either epoxy or polyester. 


Plastic wrap allowed me to shape the mixture and to ensure that it was worked in around the tubes .

 After about 15 minutes the Bondo-Hair was completely set up. I simply pulled the tubes out and voila - through-deck fittings!!

Fitting in the rough!!
With this testing complete, the remainder of the fittings should be pretty easy to complete!!

Thanks for dropping by,

Sean

Monday, March 19, 2012

Black Pearl Project - All Decked Out!


With the interior of the hull glassed, the next step was to move onto the deck. Saturday AM I did some more mouldings around the house. It was not going very well - eventhough I managed to finish the baseboards in the upstairs hall.  Saturday afternoon saw me back in the attic - ready to tackle the deck!!

I used the same tactic with the deck that I did with the hull, i.e., let the strips run off the edge and trim them later. Makes for a much quicker job!!

Below are a few shots of the progress made on Saturday afternoon.


It was St. Paddy's Day so that actually is a pint of Guinness in the mug!! The first of too many for the day/night! 

What I call the the "pixelated deck" because it looks like an image with very low resolution and therefore blocky!!

Showing the cockpit template.

Things were going great until I hit the transition from rounded deck to flat deck - right at the aft of the cockpit!! A fair bit of twisting of the strips was required!

Brace and strap used to keep the back deck flat.

And clamps used to keep the strips tight while the glue set. The staples did not have sufficient  holding power.

Half way done!!

I managed to get half of the back deck completed before supper but knowing that I could do it once meant I could do it again - and in half the time. After a feed of BBQed burgers and homemade fries, I took another pint of Guinness with me and headed back to the attic. In jig time I had the second half completed!

The remainder of Saturday night was spent partaking of various St. Patrick Day libations. A little reward for a job well done on the deck! Besides, I needed to get out of the attic and socialize a little more!!

Sunday was a bit of a break from the boat. Cheryl and I spent the afternoon by ourselves in town. A little walk around downtown and a coffee.  It was nice to get out!!

Monday was a Provincial Gov. holiday - yippee. The weather wasn't particularly nice so it was a good day to work on the boat.

In the morning I trimmed the wild edges of the deck and scraped/sanded the inside. After lunch I glassed the interior. It was rather uneventful. Must say that the pine looked nicer than I thought it would when wetted out. This part of the boat will hardly ever be seen so I saw no need to pigment the epoxy.


Deck inverted and laid in the hull while I glassed it!!

Cockpit cutout -  the underside!

The plans call for deck plates rather than hatches. I went with 8" Bomars with integral locks.


8" Bomar deck plate with lock.

Inverted deck laid in the hull.

After the glassed deck dried, I had to flip it and put it back in place - just to make sure nothing went out of whack during the glassing.  All still fits nicely!


Deck back in place - from the stern.

Cockpit from the stern.

From the bow.

 All in all, a good long weekend's work.

Thanks for dropping by, 

Sean


Friday, March 16, 2012

Black Pearl Project - I'm tired and I want to go to bed . . .

It's late on Friday night, I've had a few (too many) glasses of wine but I feel compelled to provide an update. Why you ask?? Because the next step is putting the deck on  this boat!!

To summarize, I now have the hull glassed - both inside and out. 

The pictures below show the inside of the hull prior to glassing. I used a scraper to do the "heavy" material removal. After the scraper, I used the ROS (random orbital sander)!


The inner stems were 3/4" western red cedar. Light but that does not mean you need to leave the whole thing in place!! I used a chisel to remove any "unnecessary" wood!

Chiselling out the stem - bow!
I did not take any pictures when I did the fillets of the chine seams. I simply whipped up  a batch of thickened epoxy and filled the seam. Rather uneventful!  UNTIL I decided to glass the inside of the hull!! It was 9:00 PM at this time and taking on such a task meant a few more hours of work before I could rest for the night!! I decided to go for it!

At 11:00 PM  I was finished!!!  A great thing to have out of the way but damn was I tired!!

Still this was setting me up for an "easy" Friday night" - trim the molds to conform to the shape of the deck, cut out the cockpit template, and then glue the sheer clamp in place

Molds trimmed to shape! - from the bow

Sheer clamps are simply pine strips epoxied in place. Clothes pins came in handy!!

Sheer clamps in place - stern. Clothes pins were invaluable!!
 I cut out the cockpit template as well. In this pictures you can see it  in place.


With the sheer clamps in place, the next step is actually planking the deck. Sounds good to me!!

Sean