Sunday, May 27, 2012

Black Pearl Project - Makin' a Foam Masik


I'm still working on customizing the cockpit and the next on the list is the masik. In a traditional wooden framed kayak, the masik is the curved deck beam that supports the front of the cockpit. It also acts as a brace against which to press the knees for better body to boat contact. My boat has no need for the masik as a deck beam but it does require one as a brace.

I made mine out of closed cell foam, a.k.a., interlocking foam floor tiles.


Foam floor tile.

I simply cut three strips about 1.25" wide. I laminated the strips together with Goop.

Strips ready for laminating

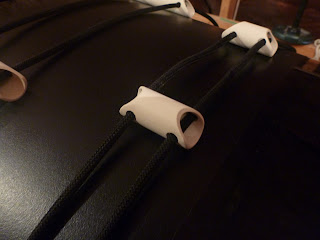
I glued up the strips and placed them inside the hull to get the right curvature. After they set up for a few minutes, I pulled out the masik and put on a raft of Schedule 40 clamps to squeeze the strips together tightly as the Goop dried.

Looks like some giant plastic caterpillar!!

After the Goop dried, I used 60 grit sandpaper to round out the edges.

Sanding.

After test fitting a few times, I glued the masik in place using Goop.

Masik in place. Clamp is holding pump holder clips in place while the epoxy dries.

The foam masik gives a very firm support for my thighs - just above the knee. I was noticing that pushing my legs up against the glass inside the deck was not good for my drysuit - the weave is not fully filled with epoxy which leaves a rough surface. Also, the foam is much more comfortable to push against than the wooden deck.  I've yet to try it on the water, but it certainly feels comfy on the land!!

Saturday, May 26, 2012

Black Pearl Project - Pump it up!!


With a low volume boat, there's the need to utilize every possible usable space.  On Thursday night I was taking the boat out in wind and wave yet I had not determined where I was to put my pump - a pretty important piece of equipment should I have to exit/re-enter the boat on my own. On a whim I popped the pump directly behind my seat and by chance it managed to stay there the whole time I was on the water. And, of course, this placed the seed in my brain- why not make this THE place to keep my pump??  The ideas started to formulate.

Anybody's who's been following my blog will remember an entry I did back in April 2010 about  a pump bracket I made out of ABS pipe and suction cups. If not, then here's the link - http://justyakkin2.blogspot.ca/2010/04/pvc-chronicles-chapter-second.html
I've used this bracket for two years with great success, so why not try it again - but with a twist!!


Now that air temps are in the "teens", you might as well work outside!!

The brackets are made of 2" ABS pipe with a section cut out. I decided to go with two brackets - one for each end of the pump. In order to affix them to the aft bulkhead, I used 1/2" Russian birch plywood (already proven to be VERY waterproof) as the baseplate. I simply put a 3/4" stainless steel screw through the pipe and into the plywood. Then I sanded the whole lot and put a coat of spray-on truck bed liner to make it match the interior of the cockpit


ABS attached to the plywood base.

I did not want to permanently attach the brackets to the aft bulkhead yet in the event that the pump placement gets in the way of boat entry/exit. I initially tried some industrial grade velcro but it did not work out well. I knew that hot melt glue can make a relatively strong, yet removable join, so I decided to go that route.

Firing up the glue gun!!

With the brackets all painted up and the glue gun ready to go, it was time to put those babies in there!

Brackets glued in place

After a few tries, I managed to get the two brackets in place. Being a bit OCD about such things, it took me a few tries to get both brackets lined up "perfectly"!

The pump popped into place just perfect in the "dry run", i.e., on the stands, so I figured I'd better give it a more "real" test. I laid the boat on the ground and did an entry. No problems. No hooking on the pump as I pushed my arse into the seat. Likewise, no problems with exiting the boat.

Next test - layback on the deck!! One concern was that, maybe, the pump would be in the way of an layback rolls!!!  All fears were allayed when I put my back right back on the aft deck. Albeit, one temp bracket join let go when I put too much pressure on it (remember the hot glue ins only a temporary fix)  but otherwise there should be no issues!!

Actually, the foam on the pump and its placement make a comfy back rest. Is it possible to kill two birds with one stone when you really only wanted to slaughter the one??? 


Pump in place. Fwd view.

Pump in place. Aft view.
The last step is to try this in the "real world"  but I'm pretty confident that all will work out just fine. And having one more piece of safety equipment on board can't be all that bad.

Thanks for dropping by,

Sean

Wednesday, May 9, 2012

Black Pearl Project - Get out of my house, Boat!!


Does anybody remember the song by the Shuffle Demons, "Get out of my house, roach"? Well. that's how I've been feeling lately about this project. Work on the boat slowed to a snail's crawl as I waited for paint to dry and while I finished off the loose ends, like the end caps.  Today, I decided that it was time to give'er the boot!!

For many (most) people removing the boat from the building area is simply a matter of flinging open a garage door or opening a basement window. But when you build an 18' 6" boat in an attic, removal tends to be much more of a production!! After supper I prepared the boat for it's send off, i.e., took it off the table, moved the table out of the way (which involved moving bits of drum kit), shifted a whack of crap and even had to remove a stud from the knee wall!!


Table shifted, boat tossed to one side!!
With the aid of Cheryl and Paddy we managed to get it down the stairs - it JUST barely fit. If not, I would've had to cut a header off the stair well. I'm glad that it went well!! 


Out the front window. Anybody following my blog for the past year will recognize this scene!!

The "hand off" to the ground crew!!

Bridget showing the lay back capabilities of the low back deck. Having a spine with only 12 years on it is a benefit too!! 

And now for some mandatory "in the garden" shots!!


Finally, an accurate representation of the foam seat and bed liner colours!! Very hard to do in the attic with a flash.

On the rocks!

On the rocks again!!

Finally a good "topside" shot!!


Nice profile shot!!


I was planning on doing a blog entry on the end caps but I got lazy!! Here's the condensed version. I decided to use squash balls as the end caps - as per the designer's suggestion. Although Bjorn Thomasson suggests the use of squash balls, I've not seen them actually used - other than on his own boat. I think they look fine. I simply cut the ball open, filled it with thickened epoxy and pushed it on over the end of the boat. I should point out that I drove a screw into each end with a little of the head left out. This provided something extra for the epoxy fuse around. These two screws are the only pieces of metal in the entire boat!!


Bow end cap - yep, that's a squash ball!!

Toggles at work!

I like to wear my love of my home province on my sleeve. And when not on my sleeve, I wear it on the bow of my kayaks!! It all started several years ago when Cheryl gave me a Republic of Newfoundland sticker for my Baffin - which I proudly displayed on my bow. When I built my Point Bennett, she bought me another one and I put that on my bow. When I built my skin on frame,  Cheryl bought me another sticker but the stitch line on the fabric did not make placement easy, so the sticker languished on my computer desk. When I decided to build the Black Pearl, it was a given that the sticker would end up on the bow. And it did!!!


The Republic of Newfoundland tri-colour!!

The boat is here in the living room with me now as I do the last bit of lashing on a paddle park. Tomorrow evening, hopefully, it'll hit the ocean!!

Thanks for dropping by,

Sean


Thursday, May 3, 2012

Black Pearl Project - Rolling the (fake) bones


I've been trying to determine how I'd make deck toggles for a few days now. I was originally going to go with wood but then an idea came to me - how about trying CPVC pipe?  It's sorta bone-like in colour and easy to work with - plus I had a piece in the shed!!!  Good enough reasons to give it a try.  I'm starting to dig the look.  And the Maroske fittings are the real cat's ass!!!

I'll admit that this boat, while based on a Greenland design, is not a traditional boat, so why confine myself to notion that it needs to look like one?

Anyway, the building of these toggles was very straightforward - cut the pipe to length, drill a hole in each end and then put it to the bench grinder to angle the ends. A little touch up sanding and we're good to go!!

You will also notice in the pictures below that opted for the truck bed liner on the foredeck where the deck lines (bungees) are located. Looks fine to me.

No captions required for these images as they are pretty self explanatory.

Next stops are the foam foot brace, attaching the seat (with velcro until I determine that it is exactly how I want it) and then actually attaching the deck lines.


Wednesday, May 2, 2012

Black Pearl Project - The Punch List

With the painting finally completed (after a few setbacks involving uncured epoxy - don't get me started), it's time to move onto things on the punch list, i.e., the last remaining tasks on the project.

I decided to go with a sculpted minicell foam seat. A local store, the Outfitters, had a piece just the size I need so I snatched it up on Monday. That evening I borrowed an angle grinder and went at it!!! It was actually a lot easier than I anticipated and came out quite well - cheap (25.99)  and light , too!!!


Just starting the grinding process.

After the initial grinding, I moved onto hand sanding for better control. The result is a nice smooth and comfy seat that fits in the boat perfectly. Not bad for an evening's work.


As it fits in the boat.

Front view - showing unfinished coaming

Fast forward to tonight - Wednesday. 

I've been leaving the coaming alone because I was unsure how to finish it and I've yet to receive my skirt so I'm laying off the final work until then. In the meantime I decided to try a different approach for painting it. I've been spraying the inside of the cockpit with a spray on truck bed liner. This is not the thick, lumpy stuff but rather it comes out a nice satin black. I've actually used it on the tips of my Greenland paddle with great results. This stuff is as tough as nail, goes on easy and dries in minutes - my kind of paint!!!  I figured it would probably work well on the coaming as it takes a bit of beating. Plus it would help fill any imperfections.


Wonder paint!!


Coaming sanded, masked and ready for painting.


First coat of bed liner!

Within minutes I had a few good coats on the coaming and extending down into the cockpit, itself . The images below show the finished product. I'm quite happy.


The next on the list was the deck plates. I picked up some SS bolts/nuts and Marine Goop today in anticipation of putting in the plates. This was almost too easy a task. To line up the bolt holes, I simply ran a piece of wool the length of the boat and used it as a reference. You can see the wool in the images above and below.

I'll admit I may have a bit of OCD when it comes to things being in their right place!!! I was really fretting over having the bolts line up directly with the centre line of the boat. I had visions of staring at misaligned bolts every time I paddled the boat. Luckily, I managed to overcome this!!!


Nice and straight!!
With the plates lined up, it was just a matter of drilling the holes, putting on a "gasket" of Marine Goop and cranking down the plates with the bolts/lock nuts.  Easy peasy.


Fore plate coaming  in place.

Rear with deck plate in place.
I've been toying with the idea of putting some extra protection on the back deck for two reasons - 1) the deck line toggles will be rubbing the deck and 2) I'll be sitting here every time I have to get in/out of the boat.  I decided to give the bed liner a whir one more time.  I masked off an area behind the cockpit and put on a few good coats of liner.  This should prove easy to maintain. If the liner gets worn, it's simply a matter of putting on a new coat!!

Now I'm trying to decide whether to do the same under the deck lines in the front of the cockpit. Any suggestions/opinions?

Masking tape but the paper was not on at this point.

Cockpit showing the bed liner  just barely visible aft of the coaming.

Well, that's the latest update. Next on the list is affixing the seat, putting in some foam footbraces and completing the deck lines. Not a whole lot left now.

Thanks for dropping by, 

Sean