It's late on Friday night, I've had a few (too many) glasses of wine but I feel compelled to provide an update. Why you ask?? Because the next step is putting the deck on this boat!!
To summarize, I now have the hull glassed - both inside and out.
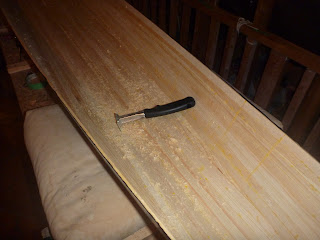
The pictures below show the inside of the hull prior to glassing. I used a scraper to do the "heavy" material removal. After the scraper, I used the ROS (random orbital sander)!
The inner stems were 3/4" western red cedar. Light but that does not mean you need to leave the whole thing in place!! I used a chisel to remove any "unnecessary" wood!
I did not take any pictures when I did the fillets of the chine seams. I simply whipped up a batch of thickened epoxy and filled the seam. Rather uneventful! UNTIL I decided to glass the inside of the hull!! It was 9:00 PM at this time and taking on such a task meant a few more hours of work before I could rest for the night!! I decided to go for it!
At 11:00 PM I was finished!!! A great thing to have out of the way but damn was I tired!!
Still this was setting me up for an "easy" Friday night" - trim the molds to conform to the shape of the deck, cut out the cockpit template, and then glue the sheer clamp in place
Sheer clamps are simply pine strips epoxied in place. Clothes pins came in handy!!
I cut out the cockpit template as well. In this pictures you can see it in place.
With the sheer clamps in place, the next step is actually planking the deck. Sounds good to me!!
Sean
To summarize, I now have the hull glassed - both inside and out.
The pictures below show the inside of the hull prior to glassing. I used a scraper to do the "heavy" material removal. After the scraper, I used the ROS (random orbital sander)!
The inner stems were 3/4" western red cedar. Light but that does not mean you need to leave the whole thing in place!! I used a chisel to remove any "unnecessary" wood!
 |
| Chiselling out the stem - bow! |
At 11:00 PM I was finished!!! A great thing to have out of the way but damn was I tired!!
Still this was setting me up for an "easy" Friday night" - trim the molds to conform to the shape of the deck, cut out the cockpit template, and then glue the sheer clamp in place
 |
| Molds trimmed to shape! - from the bow |
Sheer clamps are simply pine strips epoxied in place. Clothes pins came in handy!!
 |
| Sheer clamps in place - stern. Clothes pins were invaluable!! |
With the sheer clamps in place, the next step is actually planking the deck. Sounds good to me!!
Sean


No comments:
Post a Comment