Tuesday, November 27, 2012

Point Bennett Project - Lots Started but Nothing Finished

It's been quite some time since I've posted an update but that's not to say nothing has been done!!  As the title of this entry suggests, I've started a number of things, it's just that none of them have been fully completed. They are all interconnected and the progress of one often relies on the progress of another!!

After mating the deck to the hull and glassing it, the next step was the building of the cockpit. Unlike the first cockpit I put on this boat last year, I've decided to go with the laid up glass method. I used 1/2" foam insulation as the form around which I'd lay up the glass/epoxy.  This foam will bend to a tight radius without breaking, making it easy to get a full run around the cockpit coaming with only one join. I tacked the foam to the deck using hot glue. (Note: applying the glue to the deck first reduces the heat enough so that it does not melt the foam. Trying to glue foam to foam with hot glue does not melt as the glue melts the foam before it can stick!!!

Once I had the full band of foam in place I built up the "ears" using shorter pieces. I used contact cement to glue the foam to foam. Once the glue had set, I shaped the form using sandpaper. I rounded over the edges of the cockpit  - particularly in the rear -  for comfort during rolls.


The first strip in place.

The full form in the rough.

Shaped and sanded.

I then simply built up the glass/epoxy over the form. The glass extends under the deck to provide more rigidity. I tinted the epoxy but I will be painting the coaming as well. The coaming is prone to scratches so making it black underneath will reduce the visibility.

First layer of glass/epoxy.

After first three layers are trimmed.
Looking fwd.

I liked the foam seat that I made for my Black Pearl (BP). I thought of building another for this boat but decided to try and replicate it in the glass. I started with the BP seat as a mold. I placed a sheet of thin plastic over it. Then proceeded to lay three layers of glass/epoxy over it. Followed by one more sheet of thin plastic. Then I took some damp sand and packed it down into the seat to make sure that the glass/epoxy was pressed firmly against the "mould". After it dried, I subsequently added more layers until the seat is quite stiff. 


BP foam seat.

Plastic barrier.

Glass laid in place.

Glass wetted out with tinted epoxy.

Damp sand holding over plastic to force glass to conform to the shape.

While building up the coaming and seat, I moved on to cutting the hole for the skeg control box. This turned out to be an easy job. I simply marked thea are on the deck, drilled four holes in the corners and cut out the rectangle with a jig saw. I then recessed the opening slightly so that the control box will be flush with the deck.

Outline etched in the glass.

Holes drilled.

Control box as it now looks!

Skeg control location. Seat laid in place and looking too glossy!!

The following are just a number of images showing the project as it now stands.


I've still got some finish work left on the coaming and seat.  A few days ago I rolled on, what I hope to be, the last fill coat of epoxy. I did some good sanding prior to this last coat of epoxy and expect the final sanding to go smoothly - pun intended.  After some finishing touches, I will be ready to paint. The plan is to go with a white hull and green.deck.

I think I can see the light at the end of the tunnel!!

Thanks for dropping by,

Sean

Tuesday, November 13, 2012

Point Bennett Project - Reunited and it Feels so Good!!


With the skeg box installed and the bulkheads reshaped and fitted, the next step is putting the new deck in place. I find the mating of the deck and hull to be one of the most satisfying milestones of any build. It's when the boat actually becomes one and you can readily see and feel the final product. I say "feel" because now you can determine the heft of the boat without all the clamps, extra spacers and such required to hold the deck in place temporarily.


Hull ready to accept the deck.

The joining of the hull and deck was done on Friday night and it went without a hitch. First, I bevelled the sheer clamp to match the angle of the deck/hull join. Satisfied with a tight fit, I mixed up a number of batches of epoxy and filler to the consistency of runny peanut butter and spread this generously along the sheer clamp  and tops of the bulkheads. I apologize for not having any pictures of the actual joining but it's a pretty big job plus it can get kind of messy. The last thing I wanted to be doing was worrying about getting good pictures!!

I simply dropped the deck onto the hull (I'd already done this a number of times and knew I could do it pretty smoothly without displacing too much of the epoxy.) Once in place and lined up I proceeded to "clamp" the two together with packing tape and tie down straps. Everything went according to plan and there were no "incidences" whatsoever. Small amounts of epoxy squirted out of the seams but this was good sign that the join was not starved.

After the clamping was done, I left the boat well enough alone and went off to have a nice glass of well-deserved red wine and a bit of relaxation for the rest of the evening. 


Deck clamped in place - looking fwd.

Deck clamped in place - looking aft.

Foredeck.

I left the boat to dry overnight and on Saturday I decided to have a go at sanding. I picked up some 36 grit paper at Princess Auto . I know that 36 is a bit rough to use on pine but, boy, did it make quick work of the rough sanding!!! I spent the better part of Saturday morning finishing the rough sanding. Saturday evening I spent a few minutes filling in a few spots with some epoxy mixed with fairing powder and left the boat overnight to dry.


36 grit "wood eater"

Aft hatches - rough sanding

Fore hatch and compass - rough sanding.

Looking aft - rough sanding completed.


Looking fwd - rough sanding completed.

Sunday morning I completed the final sanding and prepared the deck for glassing. At 11:45 AM I started applying the epoxy and by 1:30 the job was done. As with joining the deck/hull, there were no "incidences" to report. 

I used the gyproc seam tape and masking tape method that I used on this boat back in Spring 2011. This time the job went even smoother and when I trimmed the excess glass off later Sunday night, I was left with a very neat and manageable seam. I'm a happy camper!!


Gyproc tape doing its "thing"!

All wetted out - looking aft.

Excess cloth trimmed.

Profile view,
I've included the above photo to show the nice low back deck that this boat now has, You caan really see the difference in the height from front to back of the coaming. The back deck now sits at 7" and front at 11"  With the cockpit coamings, the heights will be 7 3/4" and 11 3/4" which is still pretty low. This should make a big difference in the ability to do lay back rolls!!

Next on the list - cockpit coaming and skeg control box!!

Thanks for dropping by, 
Sean

Tuesday, November 6, 2012

Point Bennett Project - Yet One More Hole And Other Things

Well, it's been some time since I've posted an update on the project. Since then, I managed to make some good progress. I made the 20 Maroske deck fittings exactly as per this posting and all went smoothly. I made some of them "double" fittings meaning that there are two sets of holes two side by side. These are used when there is need for both a deck line and bungee next to each other. Sorry I didn't take any pictures but they will show up in images later in the project.

With the deck fittings completed (for now) I moved onto one of the more anticipated tasks, i.e., installing the skeg. I purchased the KajakSport skeg with the flange. This means that a recess has to be cut into the hull to accept the flange. This is opposed to the non-flanged model which simply requires that you cut a slot in the keel and attach the skeg box flush to the inside of the hull.

First attempts at cutting did not see the flange recess into the hull but rather sit on top of the keel. This left the flange quite proud of the hull. I toyed with the idea of leaving it that way and building up the hull with epoxy to make the flange flush. See images below.


The first cut.

Flange sitting too proud.

After the first cut. Not what I really want!!

After deciding that the flange was not fitting the way I wanted, I opted to attack the recess with a chisel and make it deep enough to accept the full thickness of the flange. It took some fiddling to get it to fit flush and in doing so, I managed to cut through the 4mm plywood and the glass underneath. This was no biggie as I all I had to was rebuild the opening, from the inside, with 3 layers of 6oz glass and epoxy. Then I simply recut the slot for the skeg box in the glass and I was "golden", as they say.

Looks like I chewed it out with my teeth. But it was the right depth!!

Rebuilding with the glass/epoxy

I did not take any pictures of the rebuilt opening but it did turn out perfect. The skeg box slid in snugly through the slot and the flange fit snugly and flush to the outside hull. All was right with the world.

This left the task of installing the skeg box. I opted to use West Systems epoxy to set the box in place. I prepped the ABS plastic of the box by rubbing with alcohol, sanding with 120 grit and then applying some heat with a small butane torch. This results in a surface suitable for the epoxy to adhere.

I laid a bed of thickened epoxy in the recess and set the flange in place. I used tie down straps and small scraps of wood to clamp the unit in place. Plastic stretch wrap was used to prevent the straps and wood from sticking to the epoxy.

Clamped in place. - looking fwd.

Clamped in place - looking aft.

I then flipped the hull over and proceed to fillet the skeg box in place with thickened epoxy. This is where using the flanged model really shone through. I simply had to put a nice fillet around the box and I was done. Without the flange there is more fooling around with lining up the box and using glass and epoxy to hold the unit in place. The combination of flange and fillet makes for a very strong join. In order for this box to move, it will have to take the keel and hull with it!!! It is also well sealed both on the outside under the flange and inside around the box itself. This should never leak!!

Thickened epoxy fillet.

After the epoxy set up, I flipped the hull over again and ran some thickened epoxy around the flange and recess again to fill in any gaps. Once I sand this down, and paint it, it should look quite "factory"


With the skeg box squared away (for now) I moved onto the sheer clamp. The sheer clamp is a strip of wood run along the top edge of the hull and used to help attach the deck and hull together. I used this method on my Black Pearl and it worked out quite well. I used thickened epoxy to hold the 4mm strips of pine. 

Clothes pins and Schedule 40 clamps to the rescue!!


I made cable "clips" out of small pieces of pine with holes drilled through them. I epoxied these in place. I decided to route the skeg cable under the sheer clamp rather than up under the deck. The hatch placement in the rear deck was making it problematic running the cable that way so I went with the straightest line between skeg and control in the cockpit - and that was along the hull. It also means that I can route the cable before I fix the deck in place making it a little easier.


Cable clip.

I thickened up the front bulkhead with a piece of plywood. This will give me a larger gluing surface when I mate the deck and hull. In the image below you will see that the bulkhead appears to be in two pieces. It actually is because when I dropped and reshaped the hull, I had to also reshape the bulkhead. Cutting it off completely and replacing the top with the appropriate shape was the easiest way to do it! 

Front bulkhead thickness increased.

As per my first Point Bennett deck, I went with the ABS plastic pipe cap for the recess mount for my compass. The cap is the exact same size as the opening for the compass and, believe it or not, the exact right depth!! For the sake of an ounce or two (compared to building the recess out of glass and epoxy) and about $1.50, you get the perfect compass recess. I prepped the plastic and used a fiberglass infused polyester mixture to fillet the cap to the underside of the deck.

Compass recess from the underside.

With the sheer clamp in place and the underside of the deck finished, the next steps are to angle the sheer clamp to fit the hull/deck join and then actually mate the hull and deck. Then the true fun stuff begins!!!

Thanks for dropping by,

Sean

Monday, October 22, 2012

Point Bennett Project - Holes and Hatches

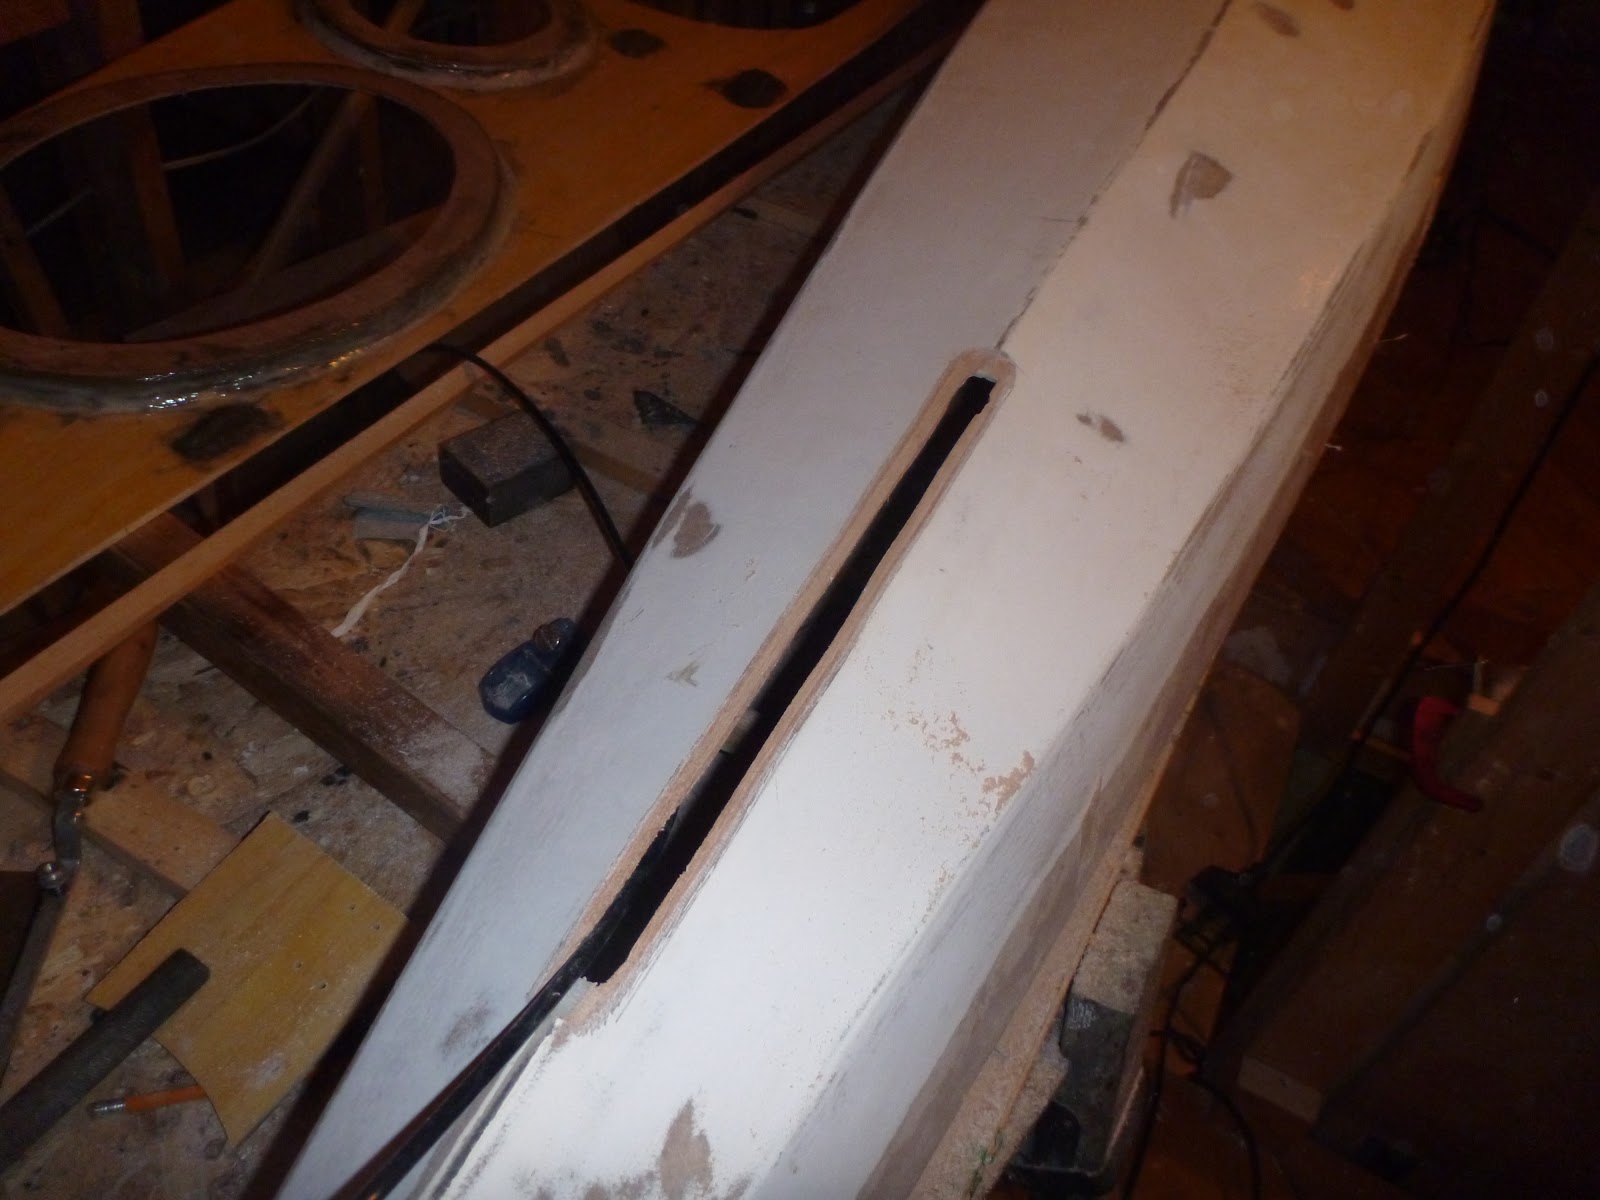
With the deck stripped out in the rough, the next step is cutting out the holes for the hatches and making the recesses. But first I had to liberate the hatch coamings from the remains of the last deck. I epoxied them in so  it was not just a matter of releasing bolts. I initially tried removing the wooden risers by using my electric planer and then a router table. Both were proving inadequate and even dangerous to the rims themselves - rotating blades can make quick work of the plastic edges and possible ruining the seal. I decided to try a heat gun to break down the epoxy. I was skeptical at first and my method was not working well, Plus the heat was proving too much for the plastic. I found that applying a LOT of heat to the back of the plywood would actually break down the adhesion and with no affect on the plastic. Badda Boom Badda Bing - the three rings broke free with little to no problem. I was a very happy camper!!!


What I had to contend with!!

I started with the front hatch. I simply marked and cut out the hole. I made the baseplate for the hatch out of 4mm marine ply. Then I started filling in the recess with vertical strips.


Getting ready for strips.

Almost all the way 'round.

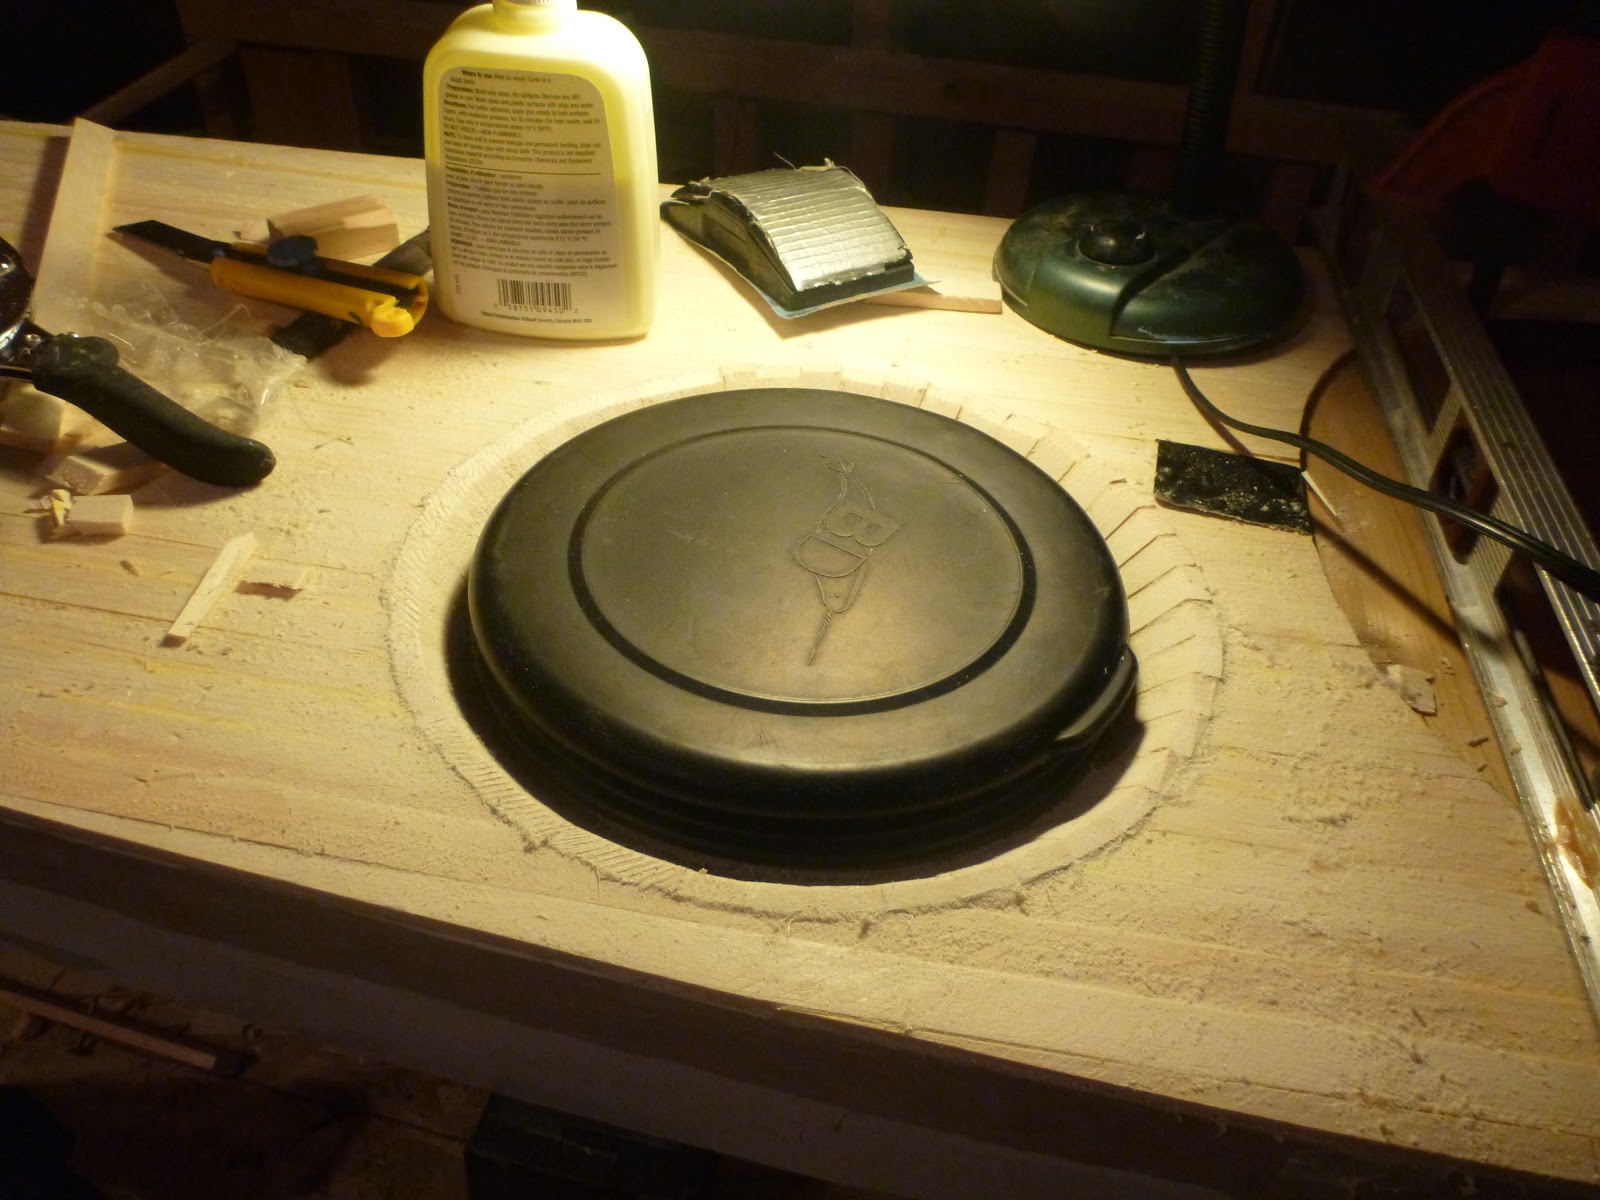
I decided to join the compass recess with the hatch for better drainage - and it looks cooler!!

I am a very empirical builder, i.e., I like to lay things out in "real life" rather than rely on theoretical measurements and such . I've always been this way and I doubt I'll ever change. Anyways, when setting up for the compass, I used the empirical method as per usual. Sanding block emulated the proper angle, the compass bezel was used and I place two strips on either side to determine the spacing.

Getting empirical!!!


Based on these findings, I marked and cut the opening for the compass recess.


Let's hope this will work!!

I cut a baseplate for the compass out of 4mm ply and tacked it in place.


Baseplate tacked in place.

Compass laid in place.

I then continued to fill in the remaining vertical strips on the hatch coaming and worked my way into the compass recess.  Easy peasy!


Hatch and compass recess "in the rough"

With the front hatch/compass recesses done, I moved on back to the day hatch. I decided to go with a bevelled recess for the rear hatches. I am hoping this will allow water to drain easier (The front hatch did not need this as there is "built-in" drainage off to either side)

As with the front, I marked and cut the hole and started filling in the vertical strips but this time cutting and gluing them at an angle. Surprisingly, cutting and fitting the bevelled strips took no more time than with the simple vertical ones on the front. Once I did a few,  I had the procedure down to a science and it went very quickly - no more than an hour on the the day hatch.


1/4 way through the vertical strips.

Bevelled recess "in the rough"

The back hatch took a little more nerve to mark and cut. This is a pretty big hatch and the deck is not very wide at this spot. I had to tuck it up pretty close to the day hatch (remember there is a bulkhead between these two hatches) and it comes pretty close to either side of the deck.

I marked it and said to myself, "Shag it, let's get cuttin'" The cut went very smoothly as did the marking and cutting of the plywood baseplate. I tacked it in place and proceeded to fill it in with vertical strips as per the day hatch. It took no more than 1.5 hours to complete this recess.


Cut and waiting.

Half-way there.

Not finished but hatches laid in place just to see how it all will look.

I've since finished the back hatch but I do not have a picture. Still, based on the image above, you can get a good idea of the final product.

The tops of the strips will need to trimmed/sanded and when the edges are rounded down, these recesses will just flow into the deck around them. Should look good when finished.

Next step - Maroske deck fittings.

Thanks for dropping by,

Sean