Well, it's been some time since I've posted an update on the project. Since then, I managed to make some good progress. I made the 20 Maroske deck fittings exactly as per this posting and all went smoothly. I made some of them "double" fittings meaning that there are two sets of holes two side by side. These are used when there is need for both a deck line and bungee next to each other. Sorry I didn't take any pictures but they will show up in images later in the project.
With the deck fittings completed (for now) I moved onto one of the more anticipated tasks, i.e., installing the skeg. I purchased the KajakSport skeg with the flange. This means that a recess has to be cut into the hull to accept the flange. This is opposed to the non-flanged model which simply requires that you cut a slot in the keel and attach the skeg box flush to the inside of the hull.
First attempts at cutting did not see the flange recess into the hull but rather sit on top of the keel. This left the flange quite proud of the hull. I toyed with the idea of leaving it that way and building up the hull with epoxy to make the flange flush. See images below.
 |
| The first cut. |
 |
| Flange sitting too proud. |
 |
| After the first cut. Not what I really want!! |
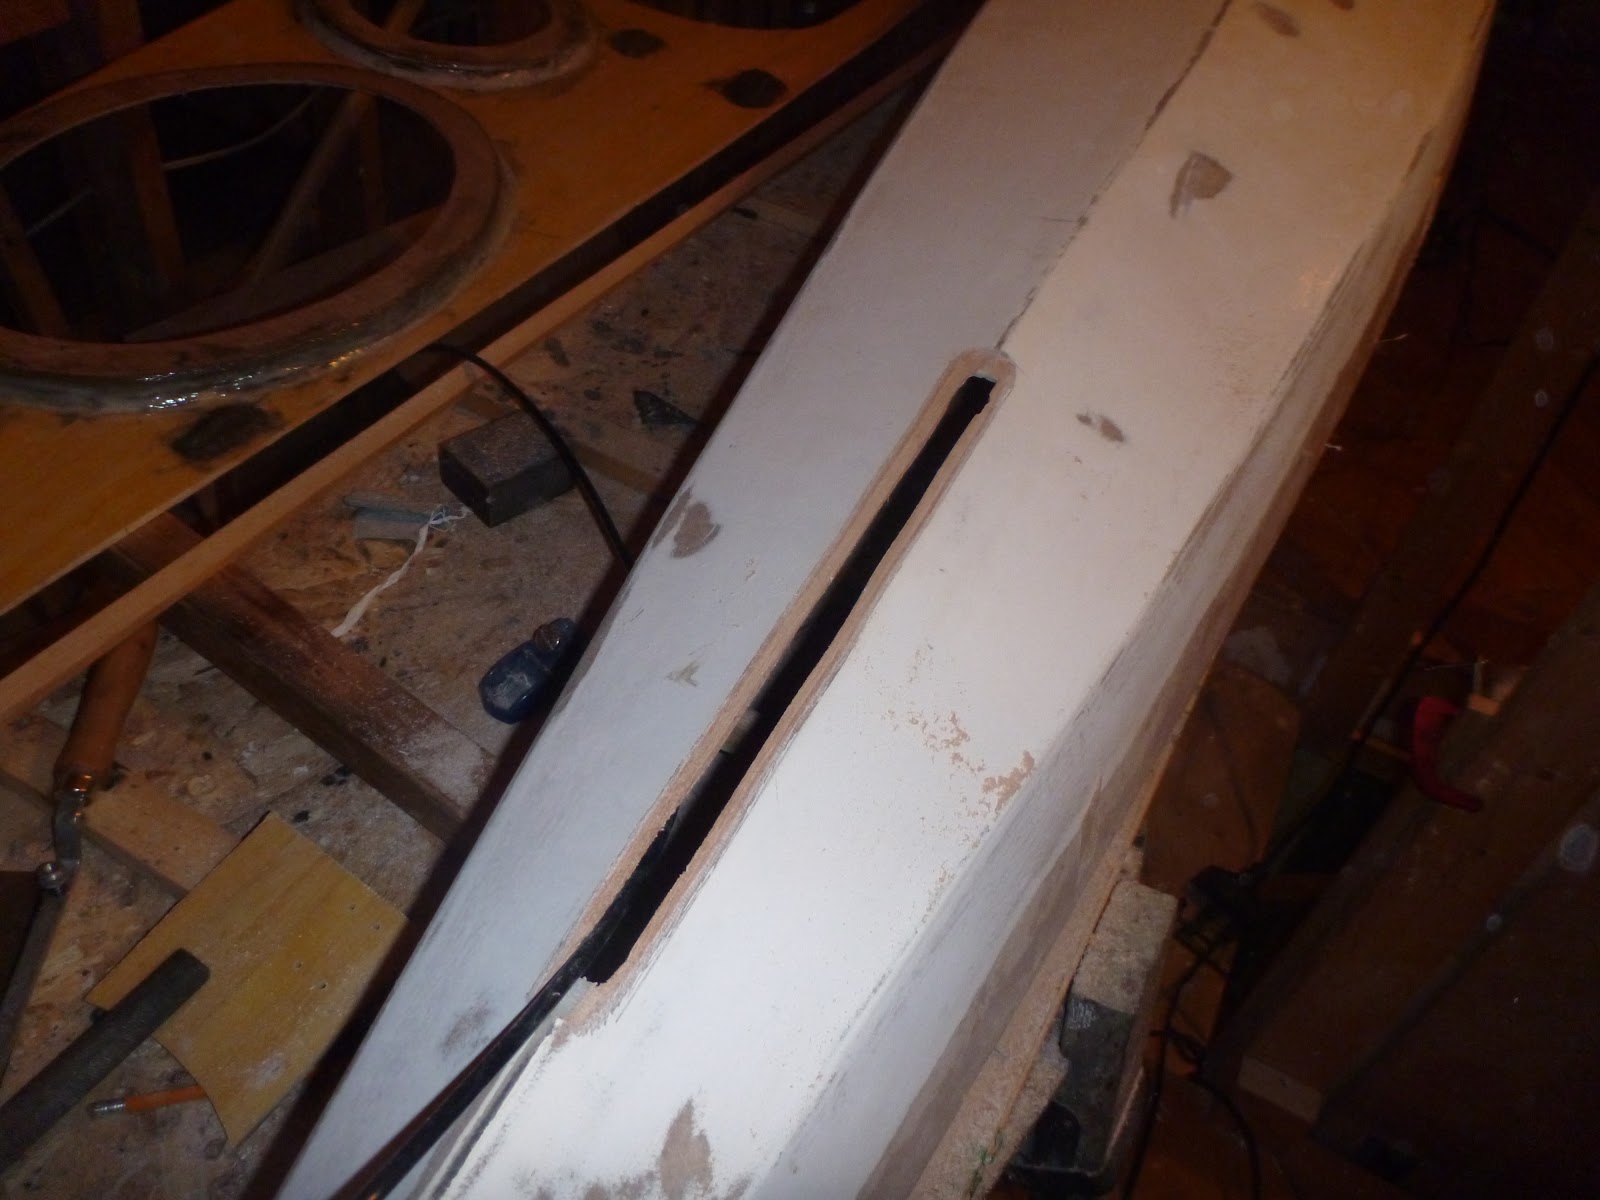
After deciding that the flange was not fitting the way I wanted, I opted to attack the recess with a chisel and make it deep enough to accept the full thickness of the flange. It took some fiddling to get it to fit flush and in doing so, I managed to cut through the 4mm plywood and the glass underneath. This was no biggie as I all I had to was rebuild the opening, from the inside, with 3 layers of 6oz glass and epoxy. Then I simply recut the slot for the skeg box in the glass and I was "golden", as they say.
 |
| Looks like I chewed it out with my teeth. But it was the right depth!! |
 |
| Rebuilding with the glass/epoxy |
I did not take any pictures of the rebuilt opening but it did turn out perfect. The skeg box slid in snugly through the slot and the flange fit snugly and flush to the outside hull. All was right with the world.
This left the task of installing the skeg box. I opted to use West Systems epoxy to set the box in place. I prepped the ABS plastic of the box by rubbing with alcohol, sanding with 120 grit and then applying some heat with a small butane torch. This results in a surface suitable for the epoxy to adhere.
I laid a bed of thickened epoxy in the recess and set the flange in place. I used tie down straps and small scraps of wood to clamp the unit in place. Plastic stretch wrap was used to prevent the straps and wood from sticking to the epoxy.
 |
| Clamped in place. - looking fwd. |
 |
| Clamped in place - looking aft. |
I then flipped the hull over and proceed to fillet the skeg box in place with thickened epoxy. This is where using the flanged model really shone through. I simply had to put a nice fillet around the box and I was done. Without the flange there is more fooling around with lining up the box and using glass and epoxy to hold the unit in place. The combination of flange and fillet makes for a very strong join. In order for this box to move, it will have to take the keel and hull with it!!! It is also well sealed both on the outside under the flange and inside around the box itself. This should never leak!!
 |
| Thickened epoxy fillet. |
After the epoxy set up, I flipped the hull over again and ran some thickened epoxy around the flange and recess again to fill in any gaps. Once I sand this down, and paint it, it should look quite "factory"

With the skeg box squared away (for now) I moved onto the sheer clamp. The sheer clamp is a strip of wood run along the top edge of the hull and used to help attach the deck and hull together. I used this method on my Black Pearl and it worked out quite well. I used thickened epoxy to hold the 4mm strips of pine.
 |
| Clothes pins and Schedule 40 clamps to the rescue!! |
I made cable "clips" out of small pieces of pine with holes drilled through them. I epoxied these in place. I decided to route the skeg cable under the sheer clamp rather than up under the deck. The hatch placement in the rear deck was making it problematic running the cable that way so I went with the straightest line between skeg and control in the cockpit - and that was along the hull. It also means that I can route the cable before I fix the deck in place making it a little easier.
 |
| Cable clip. |
I thickened up the front bulkhead with a piece of plywood. This will give me a larger gluing surface when I mate the deck and hull. In the image below you will see that the bulkhead appears to be in two pieces. It actually is because when I dropped and reshaped the hull, I had to also reshape the bulkhead. Cutting it off completely and replacing the top with the appropriate shape was the easiest way to do it!
 |
| Front bulkhead thickness increased. |
As per my first Point Bennett deck, I went with the ABS plastic pipe cap for the recess mount for my compass. The cap is the exact same size as the opening for the compass and, believe it or not, the exact right depth!! For the sake of an ounce or two (compared to building the recess out of glass and epoxy) and about $1.50, you get the perfect compass recess. I prepped the plastic and used a fiberglass infused polyester mixture to fillet the cap to the underside of the deck.
 |
| Compass recess from the underside. |
With the sheer clamp in place and the underside of the deck finished, the next steps are to angle the sheer clamp to fit the hull/deck join and then actually mate the hull and deck. Then the true fun stuff begins!!!
Thanks for dropping by,
Sean
Look's great!
ReplyDeleteThanks Lee. I find that rebuilding a boat is a lot like doing renos on the house!! It looks messy and rough while you're doing it, but if you do it right, it will look great in the end. Well, at least that's what I'm hoping!!!
ReplyDeleteSean
Hi Sean:
ReplyDeleteI have been following your advice for installing my Kajaksport skeg and it is working well. Right now, I have the hole cut with the recess routed out, so the next step is installing it. Now, I happened to see the way you set up your compass housing and was thinking of doing something similar. My strip Night Heron has a pretty good "V" from the cockpit to the bow, and I was wondering if that would be a problem. Also, what brand/model compass are you using? If your are so inclined, you can email me at jnbhawk@gmail.com
Thanks, Jack Hawkins (Guillamot Kayak Forum)
Jack:
ReplyDeleteI can't really comment on the shape of your deck and any issues you may have with recessing a compass. I can tell you that I'm using a Brunton 70p compass.
Sean