Friday, December 23, 2011

Christmas Greetings


Merry Christmas

 and a

Happy New Year!!!


Wednesday, December 14, 2011

My Bestest Paddle Ever . . .

I've often been asked about how many Greenland paddles I have made. While it is true that I went through a phase of frenzied building in 2009 and 2010 and completed a total of  10 paddles, few of these are actually still in my arsenal. My first paddle (solid spruce) was given to my sister two summers ago after she bought her new boat. The second one is languishing in the shed and has not been used in almost two years. The third iteration (my first solid cedar) has been on a long term loan to a fellow paddler for over a year now. The fourth, I gave to my wife as it was a mere 25 oz in weight and just right for her. My fifth paddle is my primary one and is the main subject of this blog entry. My sixth paddle was a solid cedar storm paddle that sees very little use. Paddles 7 and 8 were laminated beauties with great potential but due to certain design flaws they failed with great fanfare. (Number 8 snapped in two while doing a rather enthusiastic high brace in front of Greg Stamer - do'oh!!)  Paddle number 9 is a nice little solid spruce number that has been on long term loan to a fellow paddler while Number 10 is what I jokingly called the "Newfoundland Paddle" - it has a plastic edge with a wider blade for playing around the rocks.

So what makes paddle #5 so special?

It's a laminated paddle made with strips of Western Red Cedar, Spruce and Aspen. The loom has been hollowed out which dramatically reduces the weight yet it remains a strong paddle. This paddle comes in at 27 oz which is on par with most high end carbon fibre Euro paddles.

I've epoxied a plastic tip guard that has held up remarkably well for almost two years. It has managed to save the wooden tip of the paddle with no wear on the soft wood at all.

This is a fairly slender paddle - coming in at around 3.25" at the widest point of the blade. The loom is 1.25 x 1.125 and 22" in length. The paddle, overall, is 88". As per all my paddles, the edges are fairly sharp and the tips well rounded. This makes for a very quiet entry into the water. This paddle is a true joy to paddle. Also, the hollow look makes it very buoyant which is great for rolling!!

The picture below shows the detail of the tip. The white is coloured epoxy while the black is the plastic tip. The black tape is reflective.

In the beginning


After close to two years of use, I decided to do a major overhaul of the whole paddle. So I stripped the tips of most of the epoxy, removed the reflective tape and sanded the whole unit.

After stripping.

Looking a little rough.

My son wanted to see how the reflective tape worked, so I took a flash shot to illustrate.

Cool Jimi t-shirt!!
For a different look, I went with all black tips this time. In lieu of epoxy, I went with spray-on truck bed liner. This stuff is pretty tough and easier to touch up than the white tips!

As per usual, I finished the paddle with tung oil and I replaced the reflective black tape.

New tip detail.
A better idea of how it all looks!

Non-flash picture to show how the tips "normally" look.

I must admit that I am happy with the restoration project - considering it took only about an hour to complete.  I was a tad apprehensive about the all-black tips but comments were favourable when I brought it to a pool session.

I guess she's ready for another two years of use, now. I certainly hope so because I'm not sure I can ever replicate this paddle!!

Friday, November 18, 2011

A back is a terrible thing to waste . . .

I've been going through any number of attempts at creating a comfortable backrest for my Point Bennett. It started off as a solid foam pillar. This worked for a while until I found that it was creating pressure points on my back and the coaming was digging into my back whenever I tried a layback roll.  As a result I found the boat a pain (literally) to roll and my roll actually suffered because of it. I did very little rolling in this boat this summer and I never even attempted a butterfly as I knew I could not get back on the deck enough to be successful.

After suffering through the "pillar" phase, I just yanked the thing altogether and went "backless" - oh la la!!  This forced me to have a bit better posture in the boat but I soon found myself leaning all the way back to the coaming lip. It also exacerbated the problem with layback rolls as there was nothing between my back and the hard wooden lip!!  Ouch!!

This all lead me to concoct some pretty drastic remedies to lower my rear coaming to help facilitate laybacks. The most "involved" was cutting off the rear deck, dropping the sheer line and replacing the deck!! Ughhh! But I was ready to do this if it meant easier rolls!!

Thankfully I decided to try a new approach for my backrest - a full foam affair that slanted back nicely to accommodate laybacks. I whipped up a prototype (sorry no pictures) and tried it at the Tuesday night pool session. Voila!! An hour of rolling and no pain plus I was getting my back right onto the back deck!! I managed to even get my butterfly back - on both sides.  The stage was set for the "real deal".

Flash forward to Thursday night.

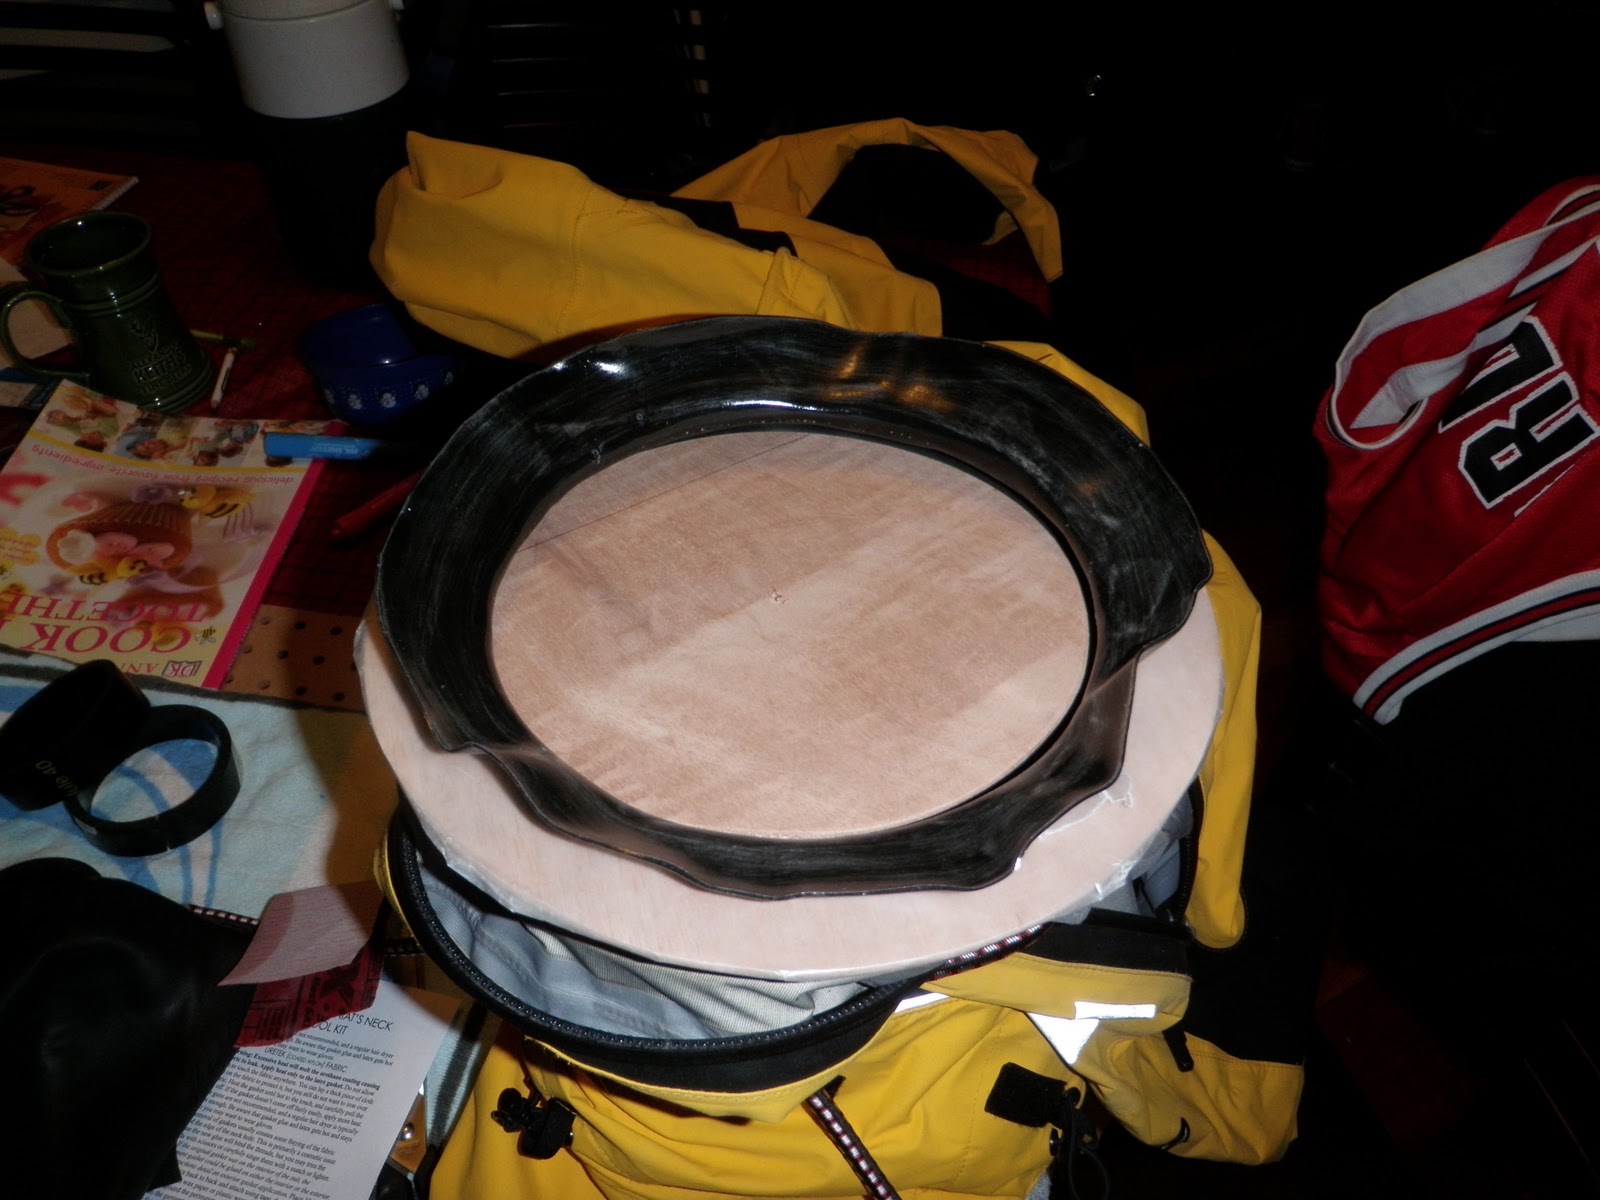
I whipped up a laminated wooden back band using some scrap 4mm ply left over from the hull.

Test fitting the laminated back band.
When it comes to foam, I always rely on the garden variety floor tile foam found at your local hardware store. 12.00 gets you an amount equivalent to a 2' x 2' x 2" piece of minicell foam!! Not a bad deal. You just need to laminate it if you need thicker stock. I use Marine Goop for this.

Foam tile with back band cut out.

I went with an angled foam pillar for a single support for the back band. I cut 6 pieces and glued them together. The lip of the seat plus friction holds the pillar in place.

Dry fitting the pillar pieces.

Clamping.

I used Marine Goop to glue the back band to the pillar. This stuff is very tenacious and with a large, flat gluing surface, this will not let go!! I added Gorilla Tape as an extra to keep the whole thing together. For those wondering, you will not see this tape as it's inside the hull and behind the seat.

From the back.

From the right side.

In place.

Initially, I had the back band snug to the rear coaming but this would severely hamper the self-bailing capabilities of the boat. One lift of the bow completely empties the hull and I did not want to mess with this at all. The whole assembly can be removed in seconds, if need be.

Showing the gap.

Of course it's too wet and cold to be doing this all outside, so the work was performed in the comfort of the living room - complete with woodstove that often made the heat unbearable. Great for drying the glue and paint, though.
Typical Friday night at my house!!

I have yet to test the new setup in the water but it's mighty comfortable sitting in it here in the living room. I also re-did my thigh and hip braces so I'm all ready to go. Sunday looks like a windy day on the water and may be just the time and place to give 'er a test!!

Sunday, October 23, 2011

Stick a fork in me, I'm done - again!!

Having built two boats in less than six months, I find myself just repeating blog entry names. Back in March I posted a blog entry with almost the same name when I was nearly finished the Point Bennett! Now, almost a month and a half after launching the Disko Bay, I am safe in saying that the boat is finally complete!!

Today, I made the decision that the deck lines were going to be finished. I've had the rope for several weeks but never got around to putting it on! It was a lovely fall day. It was sunny and warm so I dragged the boat out of the basement, popped into the back deck and set to work!! Besides the decklines, I also need to do some final touches on the back rest.

I've not decided on what type of flotation I will finally go with but for now I've got the fore and aft sections blocked with swimming noodles. Before drilling the holes for the aft deck lines, I had to take the noodles out.

How many noodles does it take the fill the aft hull?

Yep, all that foam does fit in there!

I originally had a foam pillar for a backrest but was finding that it created too much of a pressure point. I whipped up a new backrest with floor tile foam and it's working out great. I can add spacers behind it to change the angle. I made it to fit snug and added two wooden pegs to hold it in place.

Back band in place.

Peg to stop it from slipping forward.

The fwd hull is also stuffed with noodles and in order to keep them in place, I've cut and put in place a foam bulkhead . This bulkhead is not fastened but held in place merely by being pushed in tightly. Not a perfect fit but it works for testing purposes. I will replace with a better fit if the noodles actually work out.


This version of the Disko Bay, as it has a larger cockpit, does not have a true masik. As such, I've created one out of foam. It is put in place after you get in the boat and is removed before you exit. It acts a brace for your thighs for paddling and rolling. In the event of an emergency exit, it will simply pop put of place.

Foam masik
I used black rope for my decklines and maple for the links. The holes in the gunwales are sealed with black Goop. The following images show the lines and fittings and need no description.

In the meantime, I'm more than pleased with the outcome!!


Club Paddle - Aquaforte, October 22, 2011

KNL, traditionally, has its final club paddle in September but this year it never materialized - in that month anyway. Word went out from Gerard, a.k.a. G-man, that a paddle was being planned for the weekend of October 22-23. The weather proved more than favourable and crew of 11 paddlers showed up for a lovely-tell-yer-Mudder-kinda-day on the bay. Below are all the shots I took that day. Sorry, nothing spectacular but they'll do!!


Heading out!!

Hanging out!

Da b'ys!


Peter cruising along with Ferryland in the background!

At the Arch!

Neville in the "Alex" position!


Gerard in a cave, as per usual!

Great spot for a bite!!


Lots of water in the river!

If you look really close you will see Peter in the lower left of the falls


Our illustrious leader, G-Man!

Monday, October 3, 2011

Blowing a gasket . . .


Well, I had a feeling it was going to happen soon. While the suit is only 15 mos old, I could see tell tale signs that the neck gasket was getting soft. To be honest, I always thought that this particular gasket was rather thin. This was nice as it was not too restrictive yet it gave a good seal. Anyways, I was finally giving my suit a much-needed wash after the paddle on Sat when I noticed that the latex looked cracked. I stretched it a bit with my fingers and whammo, it ripped from top to bottom in one quick tear.  Not that I wanted this to happen but it's better to have it happen at home than on the water somewhere!!

I'd done gaskets before so I was not fazed by the prospect of having to replace it. Actually my first gasket was not a replacement but rather a new installation. Cheryl's suit had a neoprene collar and I installed a new latext gasket. That was a much harder job than just replacing an existing rubber gasket.


Split from stem to stern!!
A quick call to the Outfiters confirmed that they had an XL gasket in stock - thank gawd!  Last time I did a neck gasket I borrowed the wooden discs and ring from a fellow paddler. This time I decided to make my own because a) I know I'd need them again sometime in the future and b) the individual I borrowed them from last year is "in between" houses right now and I rather not bother him to find them for me.  A few pieces of scrap 4mm plywood and 30 minutes of work and I had my own set of jigs.  The instructions provided by Kokatat gave sizes that did not work with the gasket I had purchased so I had to re-work the inside diameter of the ring to accommodate the difference in size.

I'm not sure if this is "standard" but the old gasket was stitched to the suit fabric and sealed with seam tape. There was no glue/sealant on the gasket, itself. This made removal of the gasket a bit harder but I managed to get a pretty clean surface.

Wooden disk wrapped in wax paper and in position.

Getting ready to apply the Aquaseal.
Last time I did a neck gasket I had to use a wide variety of clamps and clothes pins and "what have ya" to hold the gasket in place while the Aquaseal setup. The biggest job was trying to get even pressure to prevent creep. But not this time!!! Schedule 40 clamps came to the rescue once again!!!  These simple little clamps are rapidly becoming my favourite tool - from hatches, to deck fittings, to cockpit coamings, to thigh braces, to gunwales, back to cockpit coamings and on to fabric skin.

Once I positioned the gasket in place, I simply ran a ring of Schedule 40s around the whole jig and voila - even pressure all the way 'round with no creep!! Also, I was not fighting with the extra weight of the metal clamps that have a tendency to pull the fabric downward and cause movement of the gasket.

Looks like some kind of insect!!

Modern art??

After making sure that the everything was seated propely I left the whole thing overnight. The next morning I pulled off the clamps, removed the jigs and  BADDA BOOM BADDA BING, a "factory" job

"Factory", as they say!!
The first time I tried this operation, I was covered in head to toe with Aquaseal, the gasket tried to creep off the jigs, I cursed and swore  etc etc. This time, it was almost too easy. Familiarity with the process and remaining calm are the big things - and, let's not forget that those Schedule clamps make all the difference in the world!!

Now I need to do a "real world" test  to see how it all works out, i.e., check for leaks!!  I'll also have to be bit more vigilant with the UV protectant as well!!

Thanks for dropping by,

Sean