Since my last posting I've done a fair bit of work on the boat. A lot of that was sanding the hull and deck. I opted to go with hand sanding as I didn't want dust to be going everywhere. Granted it did so even when hand sanding but it was a bit more controlled. It took about 4 nights of sanding to get the hull down to a reasonable finish. I'm down to the 150 -220 grit level now to make sure that all glass edges are feathered and any hump/lump/bumps are gone!!
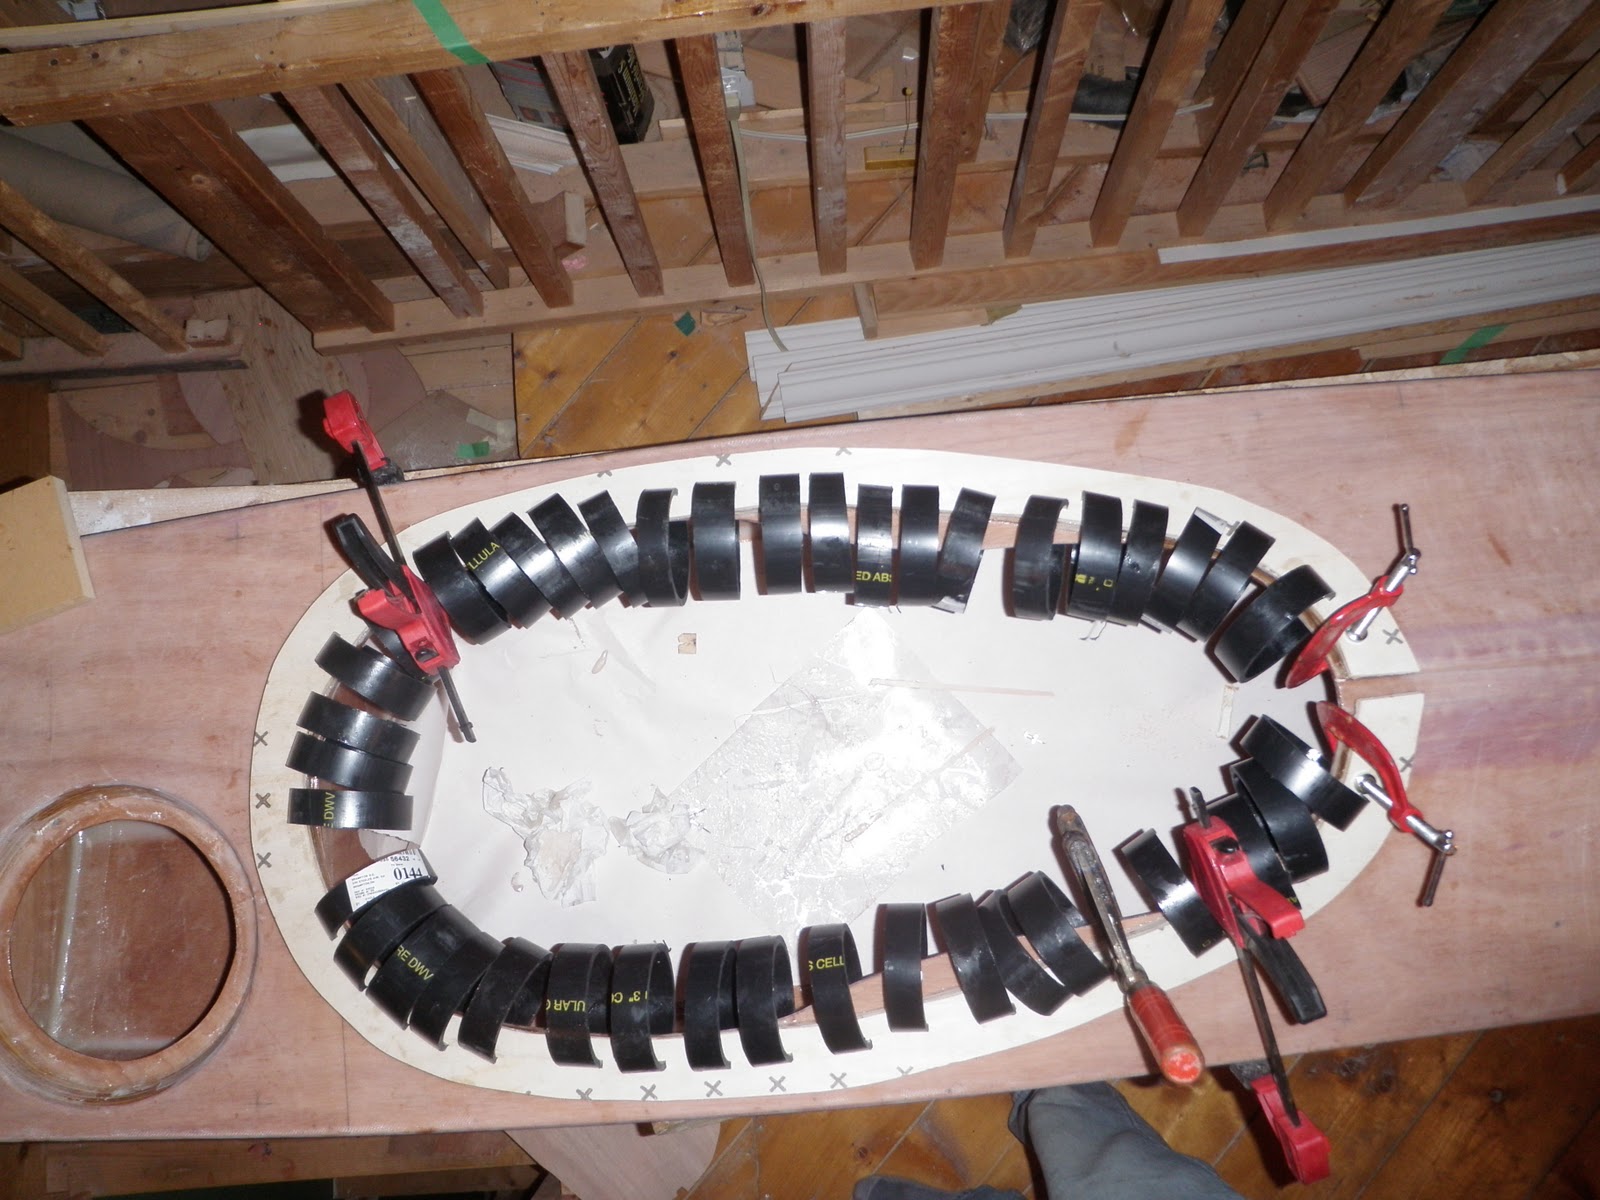
With the semi-final sanding complete, the next task was the cockpit coaming. The plans call for a 3/4" plywood spacer that is 3/4" wide. Using a template, I simply cut the spacer from 3/4" exterior grade fir plywood. I used the Schedule 40 clamps to hold it in place while the epoxy set.
 |
| Clamps, clamps, clamps . . |
 |
| and more clamps |
There's an old adage "measure twice, cut once" I'd like to revamp this by saying "read many times, cut once" I'm positive that the instructions said to cut the coaming lip to 1 1/4" width. So I cut the lip to that size and epoxied and clamped it to the spacer. I sat back to admire my handiwork and browse the instructions one more time. Well, I'll be damed if those instructions didn't say 1 3/4" for the lip.Time to panic. Luckily the epoxy was not near set so I just pulled the lip off. Also luckily I had a piece of 1/4" subfloor plywood kicking around (I just used my last piece of 4mm marine play and had nothing big enough to make a new lip). In 15 minutes or less I had the new lip cut and epoxied in place - phewww. Yet another bullet dodged!!
 |
| Here's lip #2 being glued using Schedule 40 clamps! |
 |
| Gluing the lip! |
I purposely left the lip a bit wide so that I could be bit more careful on the final trimming. Below is a handy little device I came up with to make sure that had the lip the same width/shape all the way around.
I used a combination of Shur-form, small block plane and sandpaper (ohhhh, the amount of sandpaper being used in this project!!!) to get the lip into shape!
 |
| Using the Shur-Form |
Oddly enough, it seems that I've made my cockpit about 2" longer than I had originally intended (16"x32" as opposed to 16"x30"). This is no biggie as I'm 6'3" 211 pounds and not as limber as I used to be. I can slip in and out of the cockpit quite comfortably. The only problem is that the longer cockpit with a 1 3/4" wide lip makes for a BIG sprayskirt. Unfortunately my Shocker 1.4 ain't gonna cut the mustard. I tried a 1.7 nylon skirt I had but it too was too tight. I decided to cut back the lip and you guessed it - almost right back to the size of the one I ripped off the night before!!
The next day I picked up a new 1.7 Shocker. After a little more work on the lip, it fits like a charm!! Sorry no shots of the skirt in place but I'm sure you can get a mental image! For those wondering, the smaller lip holds the skirt with great tenacity. I'm actually a little intimidated by the grip but I'm sure I'll get used to it.
I really like the seat in my Baffin. It has a raised front that puts your thighs in a slightly elevated position. I decided that I'd try to replicate this seat in foam. I went to the basement and pulled the seat out of the Baffin so it would be easier to work with. Just for sh!ts and giggles I decided to drop the seat in the new boat to see how it fit. Well, I'll be damned if that thing didn't fit just PERFECT! With a little twisting it just shoe horned right in!! The hip plates/hangers snugged up just under the coaming and the base of the seat matched the hull shape ever so sweetly!! Problem solved - I ain't going through the hassle of making a new seat. I'll just see if Boreal Designs will sell me one. Already got the email sent off to them. In the meantime, the Baffin will remain sans seat!!
I will be replacing the backband with a solid foam pillar that will give a little suppurt just to centre part of my lower back.
 |
| Lip/coaming epoxied, seat in place. |
 |
| Profile of coaming. |
 |
| Looking fwd from day hatch. |
 |
| A very neat fit!! Backband is just hanging there for now. Don't be deceived by the camera angle - it makes the cockpit look asymmetrical. |
 |
| Looking aft from front hatch. |
 |
| Hatches laid in place. |
 |
| Looking aft. |
With the seat taken care of (for now), the things left on the "to do" list are - sand and epoxy the coaming a few more times - do some more sanding on the deck/hull - fasten in the hatches - devise the thigh braces (already got some good ideas) - paint the whole thing and then affix the deck rigging. Certainly not big tasks when you consider what I've gone through these past two months!!
Thanks for dropping by!!


I've been following along and thanks because you've convinced me not to go down this road but I take my hat off to you. Looking forward to seeing the final product. Stay patient and float it after you've go it painted.
ReplyDeleteTony :-)
Tony: It can be a lonely road - lots of time alone in the attic by myself - - BUT oh what a feeling of accomplishment!! Tonight I SAT in the boat and worked on actual "fitting" of the boat. When you get to the point of making the boat "yours" you know you're getting close to the end!!
ReplyDeleteGiven the job it will take to get this boat out of the house, I'm thinking it will be there until the final lick of paint is on it!
I've give it a week or less,
Sean