It's been almost a week since I've posted an update, and, yes, a bit of progress has been made in the interim. So here goes . . .
The last photo in my latest entry was that of a new electric ROS - random orbital sander. The ROS worked great for taking down the strips to the one level but I didn't want to use it for final fairing of the flat hull. Using a sanding block was certainly an option but I grew to like the idea of the shop vac sucking up all errant dust. The obvious solution was to devise a sanding block that could be attached to the shop vac. No biggie, I figured. An hour later it was done. I simply made a hollow block out of some scrap plywood and a few short pieces of pine strips. Luckily I had an old vac head lying about so I trimmed it to fit on top of the block.
Works like a charm!!
 |
| Vaccum assisted sanding block! |
 |
| Not pretty but it sure works!! |
There comes a time in every boat building project where you just have to say "Shag it, that's enough sanding"!! I reached mine on Thursday. After fretting and sweating over the hull for several days I decided that it was good enough. Besides any small imperfections would be hidden under 6oz glass a several coats of epoxy, right?
On Thursday night I ran a thin coat of epoxy to seal the bare wood in preparation for the glass. The pump on my can of epoxy resin was acting up but I managed to get a good enough mixture and it set properly!!
Below are the only two pictures of the bare hull with the clear epoxy. Many people strive for this wooden look but it does nothing for me. Believe it or not but I'm the only person to actually see the hull in this state. These pictures and my memories are all that remain of this moment in time!! Deep, what??
 |
| Sealing coat of epoxy. |
 |
| Bow. |
With the bare wood sealed, the next step is glassing the hull. As with my stitch and glue, I'm going with 6oz glass. It's pretty heavy but better heavy and durable than light and less durable, I say.
 |
| Draped in the glass shroud. |
I've decided that I wanted to pigment my epoxy so that any scratches on a black hull would less noticeable. A few years ago I managed to find some epoxy pigment at a local store but when I inquired about it a few days ago, of course, they no longer carry it. I did a lot of searching on the Internet for "safe" ways of colouring epoxy. I happened upon a page at the West Systems website that gave me some great ideas. One was the use of tempera paint powder. Not only is it a safe pigment but it actually increases the adhesion of the epoxy. A trip to Michael's Craft's yielded a bottle (enough to do the whole boat many times over) for just $9.00. Yes!!! West does sell graphite that would not only colour the epoxy but also make it more durable but that stuff is very expensive and the hardness would increase the difficulty in sanding as well. I'll stick with the $9.00 bottle of tempera paint powder!!
 |
| A great find!! |
As mentioned, my resin pump was acting up. I thought it was dead and would mean no work on Friday night. But I took the damn thing apart and cleaned it with acetone. Badda boom. Badda bing. It's now working like a charm and crisis averted!!
I mixed the first batch of pigmented epoxy a little weak - but on purpose. I did not want to thicken the first coat of epoxy as this was the "wetting out" stage and I wanted to make sure that nothing went wrong - like the epoxy being too thick to properly soak the cloth. Of the course the result was a grey colour - almost seal skin-like!!
 |
| The Mottled Grey Pearl! |
After wetting out the first coat, it was time to add the second layer of glass to the the hull below the chines - often referred to as the football - for extra abrasion resistance. As with my stitch and glue, I ran tape along the chine. When the glass was being wetted out, the tape prevents the extra glass from being glued to the glass above the chine. When the epoxy is partially set, I cut the second layer of glass with a sharp blade right at the edge of the tape. This leaves a very neat and tidy join that can be feathered afterwards.
 |
| Glassing up the football!! |
With both layers in place, there's nothing left to do but fill the weave of the glass with epoxy. With the first coats out of the way, I increased the amount of tempera powder in the mixture to help blacken the hull more.
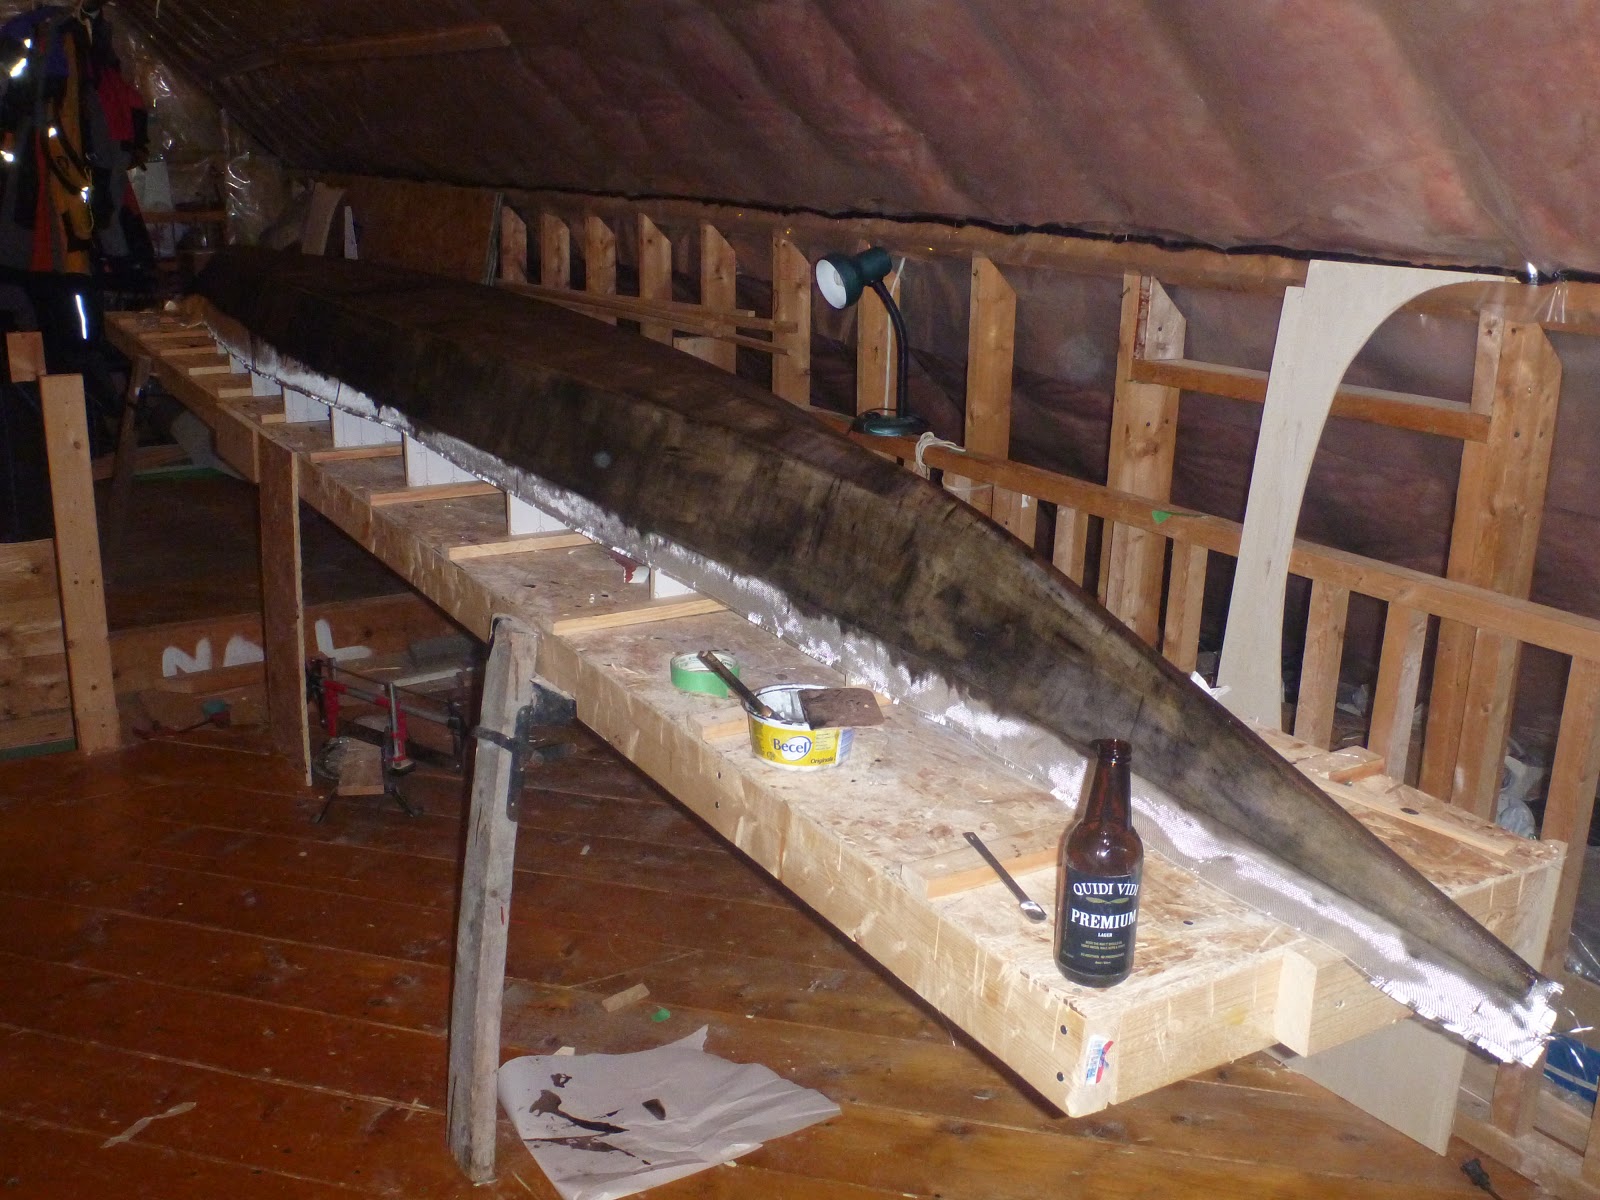
Right now I have three thin coats on and the weave has just disappeared. In the image below you will see a rather rough-looking surface. This is from the very small bubbles created by the roller. I tried to tip them out with a foam brush but it was not worth the hassle. They'll just rub out with sand paper later on.
 |
| From the bow. Three thin coats of epoxy |
 |
| From the stern. |
 |
| Port quarter. |
How the third coat looks after drying will determine my next course of action - either one more coat or, if it looks fine, take the boat off the molds and begin thinking about doing the inside of the hull!!
Out of the blue and into the black
You pay for this and they give you that
Once you're gone, you can't come back
When you're out of the blue
And into the black
Hey hey, my my... looking good Sean. Love the black. Will it still need to be painted or is the pigment in the epoxy be good enough?
ReplyDeleteThe pigment is not enough for a final coat - no UV protection. It'll just be a great base for the black paint.
ReplyDelete