Saturday, March 26, 2011

Feelin' blue!!

Almost two months to the day of starting this boat, I finally get a real good idea of the finished product. I put the first coat of blue on the deck and I'm really liking it!!  After I finished, I looked at the boat and thought "something looks very familiar about this" Then it clicked. Back in 1979 I built an 11ft skin on frame. It was a wooden frame covered in painted canvas. The hull was painted white and the deck was almost the exact same shade of blue that I have on the new boat. Co-inkydink?? Perhaps, not!!

The images below were taken just after the first coat of blue paint. The masking tape is still in place. Any "blemishes" you see on the deck are the holes for the pad eyes.


Friday, March 25, 2011

On Deck - again!!

The third coat of paint was put on the hull on Thursday night. I contemplated a 4th but decided not too. If I ever need to touch up the hull, it's just a brush stroke away.

Friday was, believe it or not, a snow day. Even the Provincial Government was closed. Even with all this time on my hands, there was not much to do today. I did some work on my pad eyes - ground down the square edges on the plywood backing.

Then I set to work on preparing the deck for painting. I wet sanded the whole deck, the cockpit coaming and scrubbed the epoxy around the hatches because I knew there was amine blush there. Amine blush will turn your polyurethane paint to mush if you try to cover it!!  It was an easy day. Tonight we're asked out to supper so no work will be done further on the boat this day. My son has a basketball tournament tomorrow (Sat) but between games I should get a coat of blue on the deck.

I snapped off a few shots of the boat after I finished swabbing the deck. I popped the hatch covers on just for effect.  The white deck and wooden deck look nice - sorta Betsie Bay-ish!. But I can't go that route because of too many pencil marks and such found under the layer of epoxy. I put in a few pad eyes in and some deck lines to see what it would look like. The compass is laid in there as well. Tomorrow this deck will be blue!!


Tick tock.  Tick tock!!

Monday, March 21, 2011

The Point of No Return


There comes a time when you just have to say "that's enough" - especially when it comes to sanding. I finished off the 220 grit last night but had to fill in a few small blemishes. I hated having to do this but I could not leave them as is. I was being pretty picky with the feathering of tape edges because I did not know how much, if any, that the paint would cover any rough edges. Anyway, today I decided that I was finished sanding.  It's time to paint.

I knew that IMP Marine had some Interlux Brightsides in stock - this is a one part polyurethane paint. From the start I decided that I wanted to go with a white hull and blue deck. Not being one to concern myself with colours, I simply dropped by the store and bought what ever they had in stock. I went with Saphire Blue and Blue Glo White (which is just a very bright white)


I gave the hull a rub down with acetone and when the saw dust was cleared, it showed a lovely looking natural finish to the hull. 

A lovely soft hue!!
I taped the sheer with masking tape. Note to self - buy better tape. This just started to peel off as I was painting. I'll simply feather the paint edge when I'm finished and retape the deck - with proper tape!!

Taped sheer.
I flipped the boat back over and set to the task of painting. Did I mention that I truly hate painting?? I usually throw lots of paint at a surface and hope the first coat is enough!! But not this time. Too much work invested in this project to go and get sloppy!!

I happened upon a method that works great with polyurethane paints to give a mirror-like finish. I think the person who devised it must've been a kayaker because it's called "roll and tip".  You roll on a coat of paint and then tip or smooth out any bubbles or streaks using a dry brush. I used a foam rolled and a foam brush with pretty nice results.

Once I got the hang of it, it was pretty easy to do. I came close to having a few sags at the beginning but realized that a lot of paint was not required for coverage. There's two more coats to come, so why try to put on one thick one that'll just run like a river?


Port Bow

Port Quarter
I really like these two images below - one with flash, the other without - as they show the reflective qualities of the paint. Remember, this is the initial coat that has been applied directly over un-primed glass/epoxy. The second coat should be smoother as I'll sand this first coat before applying another. I also have a better understanding of the "roll and tip" method and should get better.

One sleek hull. Look at how the reflection makes the hull seem to disappear!

Made to slice the water, what?

Anyhow, that's the initial paint job. 16 hrs between coats is required so another one can't go on until tomorrow night. Plus, I'm staying out of the work area to prevent stirring up any dust. This all means that I can, with good conscience, take a break from building. Maybe I'll have a beer and watch a movie!! 

Thanks for dropping by - not long now!!


Saturday, March 19, 2011

Fittin' and Finishin'


Things are moving into the nitty gritty stage now. Fittin' and finishin', so to speak.  Once I knew what seat I was going to use and where it was to be located, I needed to work on where my feet would rest. But before I get to that, here's a picture of my 11 yr old daughter sitting in the boat. Just before this, my wife, Cheryl, gave it a whir as well. It's funny but both had the same reaction - the fear to actually step on the boat. Both were afraid that it would break. I'll admit that my first time was the same. I was waiting for the big CRAAAACK as the plywood snapped under my weight. Well, there wasn't even some much as a creak!!


Here's hoping Bridget shows as much interest on the water!!

With the seat fitted, I now know where my feet will rest. I'm using the front bulkhead as my foot brace. I left enough space so that I'd have to fill in foam or some other material. Mini-cell foam is not readily available so I went with an alternative - foam floor "tiles" from Canadian Tire. 4 tiles @ 24" x 24" x 1/2" for 14.99 is not a bad price!!  I went with one full layer to fit against the bulkhead with 3 smaller layers for a) weight saving and b) a central gap in which to stretch my legs.  I glued them all together with Marine Goop. For those edges that would be kicked and rubbed, I ran a strip of Gorilla Tape and Goop. Gorilla Tape is now my "tool" of choice. Expect to see it again on this boat - in the most unlikely of places!!!


After much deliberation, I decided to epoxy my hatch rims in place. No screws or bolts.  I had some G-Flex epoxy which is a special adhesive by West Systems for gluing plastic. This was free so I figured I'd give it a shot. I threw in a bit of 406 filler and laid a good bead around the rim of each hatch. I popped the rims in the boat and laid weights on top to keep in place.  All went according to plan.


Rim with G-Flex.

While the rims were setting up, I finally got around to making the pad eyes for holding the deck lines and bungees. I needed a total of 23 units - which included cutting the small plywood backing, cutting a 3/4" slot and then epoxying the nylon webbing in place. It was not as tedious as I though and only took an hour or so.

I cut the plywood backing plates and made the slots in my work space in the attic. I decided to do the gluing up on the dining room table so that I could be with my wife as she worked on some sewing. I used to always work on my dining room table until we got a new one a few months back!! But I figured that gluing up the pad eyes was pretty benign work - as long as I provided adequate protection, i.e., a piece of plywood, for the table.

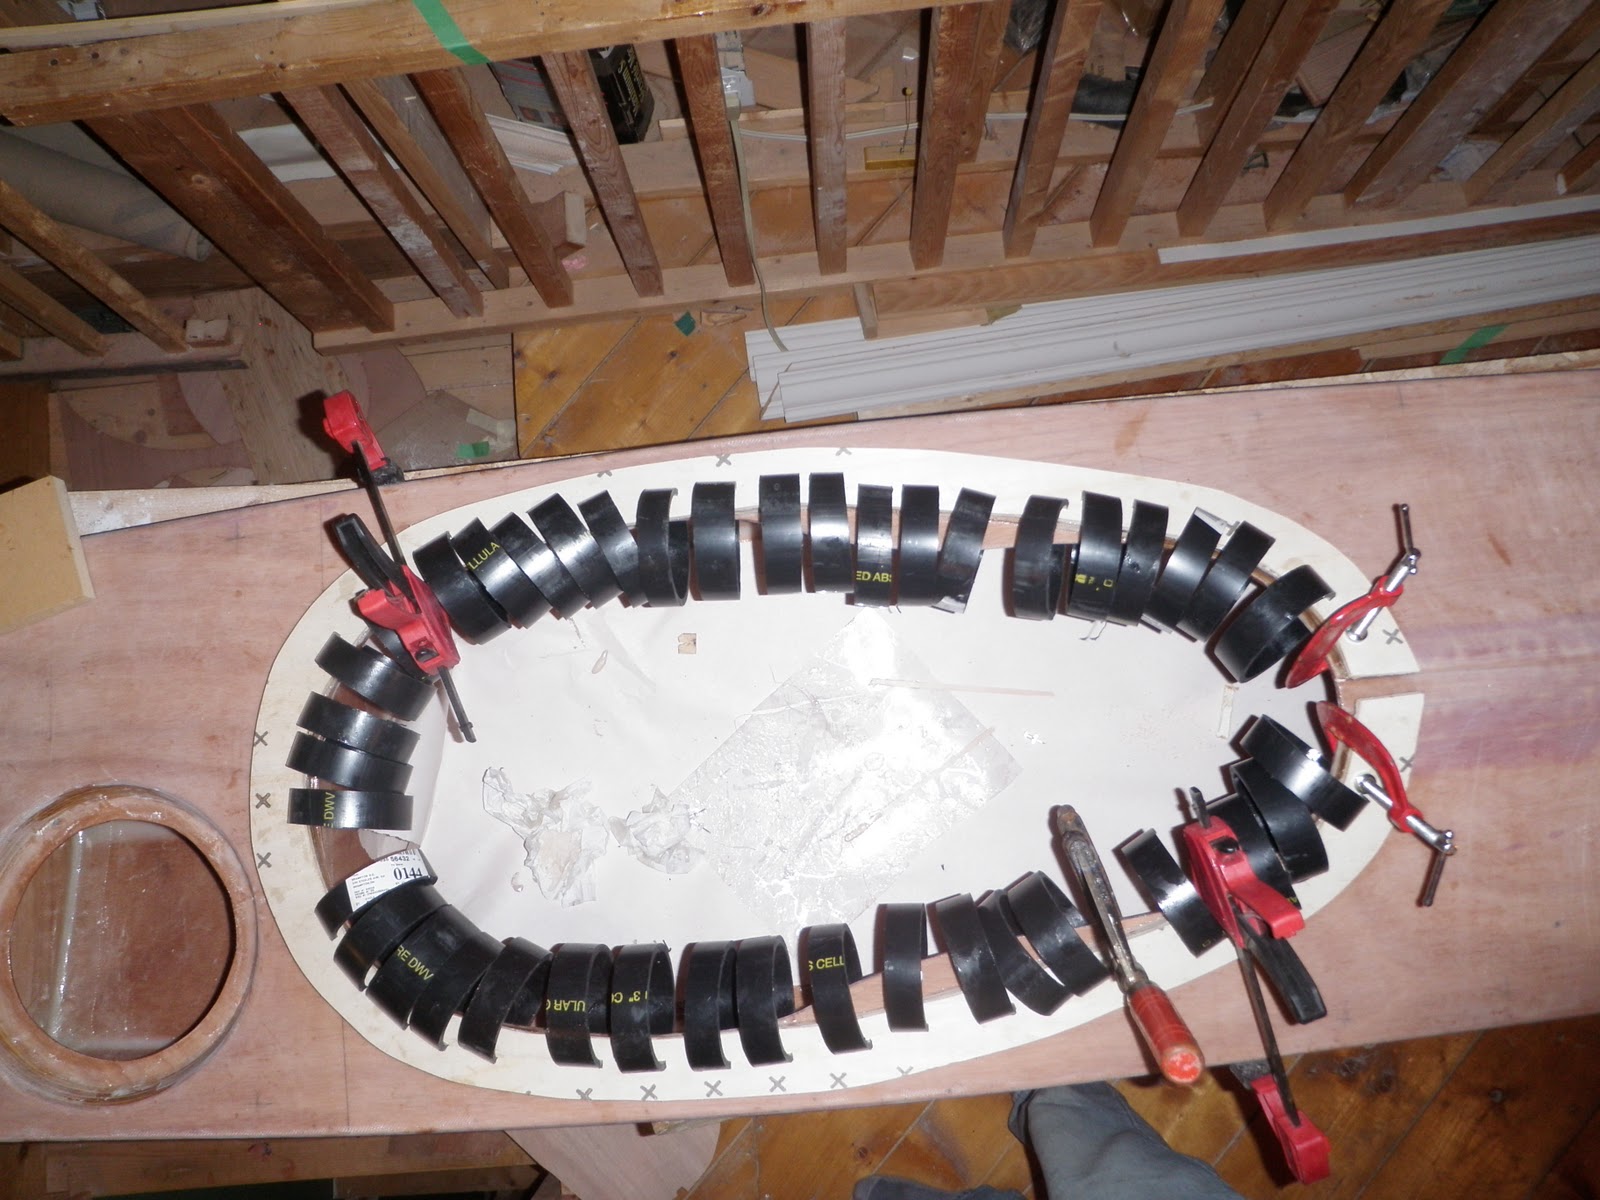
Funny but gluing up the 23 pad eyes took very little time and was without incident.  It was made much easier by the use of, you guessed it, those Schedule 40 clamps!! They were perfect for the task.


Mylar stops backing plate from sticking to plywood used to "squat" the nylon into the epoxy. The Schedule 40s were perfect for this.


A pad eye from below showing the nylon encased in epoxy.


All the pad eyes glued.

Sitting and gluing 23 of these while having a few drinks of Tullamore Dew Irish Whiskey (in honor of St. Patrick's Day) can certainly have an effect on you.

Thanks Cheryl for the lovely picture!!

Saturday saw me cutting into the deck - again. I needed to cut 23 slots in the deck for those pad eyes I made the night before!!

I devised a simple jig out of plywood. I'd simply use it to locate and drill 4 holes in the deck. Then I'd use a razor blade knife, file and sand paper to make the final cuts.


Simple jig that worked flawlessly.

Sometimes the most unlikely of tools will be the most useful.  I was tasked with making 23 slots that were 3/4" wide. I found that my garden variety file was just the right thickness and, once I marked off a spot, was exactly 3/4" wide. Once I determined this, it was simply a matter of working the file into the rough hole until it hit the tape marker - at which point I knew the slot was the exact size needed. Too easy!!  After about hour I had all 23 slots made!!


File in up the hilt means a perfect sized slot.

Here's pad eye laid in place. Nice and neat - and soft so they won't tear your legs off during rescues!!

Last night I just epoxied the rims in. Tonight I ran a good bead of epoxy around the rims to fill in any gaps.


Front hatch fully encased in epoxy.


The front hatch again.

While all this was going on I ran another coat of epoxy over the coaming and epoxied the sides of the pad eyes slots for better water resistance.

That's enough for one day especially when the builder is fighting a cold and feeling quite nauseous!!

Cheers,
Sean

Thursday, March 17, 2011

Some days are dust and some days are diamonds . . .

Since my last posting I've done a fair bit of work on the boat. A lot of that was sanding the hull and deck. I opted to go with hand sanding as I didn't want dust to be going everywhere. Granted it did so even when hand sanding but it was a bit more controlled. It took about 4 nights of sanding to get the hull down to a reasonable finish. I'm down to the 150 -220 grit level now to make sure that all glass edges are feathered and any hump/lump/bumps are gone!!

With the semi-final sanding complete, the next task was the cockpit coaming. The plans call for a 3/4" plywood spacer that is 3/4" wide. Using a template, I simply cut the spacer from 3/4" exterior grade fir plywood. I used the Schedule 40 clamps to hold it in place while the epoxy set.

Clamps, clamps, clamps . . 

and more clamps

There's an old adage "measure twice, cut once"  I'd like to revamp this by saying "read many times, cut once"  I'm positive that the instructions said to cut the coaming lip to 1 1/4"  width. So I cut the lip to that size and epoxied and clamped it to the spacer. I sat back to admire my handiwork and browse the instructions one more time. Well, I'll be damed if those instructions didn't say 1 3/4" for the lip.Time to panic. Luckily the epoxy was not near set so I just pulled the lip off. Also luckily I had a piece of 1/4" subfloor plywood kicking around (I just used my last piece of 4mm marine play and had nothing big enough to make a new lip).  In 15 minutes or less I had the new lip cut and epoxied in place - phewww.  Yet another bullet dodged!!


Here's lip #2 being glued using Schedule 40 clamps!

Gluing the lip!

I purposely left the lip a bit wide so that I could be bit more careful on the final trimming. Below is a handy little device I came up with to make sure that had the lip the same width/shape all the way around.


I used a combination of Shur-form, small block plane and sandpaper (ohhhh, the amount of sandpaper being used in this project!!!) to get the lip into shape!

Using the Shur-Form

Oddly enough, it seems that I've made my cockpit about 2" longer than I had originally intended (16"x32" as opposed to 16"x30"). This is no biggie as I'm 6'3" 211 pounds and not as limber as I used to be. I can slip in and out of the cockpit quite comfortably. The only problem is that the longer cockpit with a 1 3/4" wide lip makes for a BIG sprayskirt. Unfortunately my  Shocker 1.4 ain't gonna cut the mustard. I tried a 1.7 nylon skirt I had but it too was too tight. I decided to cut back the lip and you guessed it - almost right back to the size of the one I ripped off the night before!!

The next day I picked up a new 1.7 Shocker. After a little more work on the lip, it fits like a charm!! Sorry no shots of the skirt in place but I'm sure you can get a mental image!  For those wondering, the smaller lip holds the skirt with great tenacity. I'm actually a little intimidated by the grip but I'm sure I'll get used to it.

I really like the seat in my Baffin. It has a raised front that puts your thighs in a slightly elevated position. I decided that I'd try to replicate this seat in foam. I went to the basement and pulled the seat out of the Baffin so it would be easier to work with. Just for sh!ts and giggles I decided to drop the seat in the new boat to see how it fit. Well, I'll be damned if that thing didn't fit just PERFECT!  With a little twisting it just shoe horned right in!! The hip plates/hangers snugged up just under the coaming and the base of the seat matched the hull shape ever so sweetly!!  Problem solved - I ain't going through the hassle of making a new seat. I'll just see if Boreal Designs will sell me one. Already got the email sent off to them. In the meantime, the Baffin will remain sans seat!!

I will be replacing the backband with a solid foam pillar that will give a little suppurt just to centre part of my lower back.

Lip/coaming epoxied, seat in place.

Profile of coaming.
Looking fwd from day hatch.

A very neat fit!! Backband is just hanging there for now. Don't be deceived by the camera angle - it makes the cockpit look asymmetrical.

Looking aft from front hatch.

Hatches laid in place.

Looking aft.
With the seat taken care of (for now), the things left on the "to do" list are  - sand and epoxy the coaming a few more times -  do some more sanding on the deck/hull - fasten in the hatches - devise the thigh braces (already got some good ideas)  - paint the whole thing and then affix the deck rigging.  Certainly not big tasks when you consider what I've gone through these past two months!!

Thanks for dropping by!!

Monday, March 7, 2011

The price you pay . . .

Last weekend saw the mating of the deck and hull. This weekend saw the final consumation of the union - glassing the topside of the deck and tying the deck and hull together for ever (hopefully).

Friday night I had a few small jobs to complete - finishing the filleting and taping on the bulkheads. With that complete, I took the rest of the night "off" to watch some TV with the family.

Saturday morning was a beautiful sunny day and I knew that a crowd of fellow paddlers were heading out but strong is the addiction when building a boat. I turned my gaze away from the waters of the bay and headed up to the attic to glass the deck.

I read of a neat trick to get a nice clean edge when overlapping glass joins. Normally what you'd do is run a wide strip of masking tape, let the glass hang down over the strip and epoxy just overlapping the tape. When the epoxy is almost cured, take a sharp blade and cut the glass right at the edge of the tape. Looked good in the book so I figured I'd give it a whir. Not having wide masking tape and dredged up an old roll of gyprock tape. I simply ran masking tape alomg the edge and made a nice wide strip.


Then I laid the glass over the boat and trimmed it so that it fell within the confines of the strip.  I used some Schedule 40 clamps to hold the glass in place initially.


Applying the first coat of epoxy took a few hours but was rather uneventful, nonetheless.

After first coat of epoxy.

The image below shows the trimming process using the wide tape. By cutting along the edge of the tape, you are leaving a nice crisp edge. This will later be feathered after I apply my epoxy. It's nice using this metthod because you are not fighting with itinerent/wayward glass strands that can be a real PITA to keep down flat as you bush on the epoxy!!

Nice and neat!

Trimmed edge at the bow.
It's sure nice to see the whole thing covered in glass and epoxy. Below are two nice shots showing the deck with one coat of epoxy. Notice that it's not yet shiny. The first coat does not fill the weave of the cloth, instead it leaves a rough surface. This rough surface cuts down on the flash glare and makes for a nicer photo!!

Looking Fwd
Looking Aft
I entitled this entry "the price you pay" because the amount of time I'm spending on building this boat could very well be spent on paddling my plastic one. I'll admit that I would like like to get out for a paddle but then I look at this new boat and I can't wait to get it out on the water. As I always say, the water ain't going nowhere!!  It'll still be there when I'm finished this project and then I'll make up for lost time.

I have one more coat of epoxy (the 3rd)  left for the deck. Last night I started sizing up the cockpit coaminig - the next task on the list!!

Friday, March 4, 2011

Crappy work AND crappy pictures

I haven't posted in several days but work has been progressing. I just completed taping and filleting the inside seams and bulkheads.

I entitled this post "Crappy work AND crappy pictures" because, of all the work I've done so far, this was the least enjoyable as well as the hardest to get pictures of.

After joining the deck and hull, there is a need to fillet the deck/hull seam and then tape it. No big deal - IF THE BOAT DOESN'T HAVE A FULL DECK!!  This means getting epoxy/filler right to the bow and stern. Access to these points is only through the aft/fwd hatches. The aft hatch is bigger and affords a little more room to work from. The fwd, on the other hand, is mere 10" round - which means my head would fit through but not at the same time as my hands. This meant applying the fillet and tape totally blind or simply by sense of touch. Pretty tricky. I'd do a bit of work and then place a flashlight inside, pop my head in and survey the work. Repeat as necessary. This took several hours to complete.

For filleting the bow and stern, I'd scoop up the thickened epoxy on a long stick, put the stick inside the hull and drop it on the seam. Then I''d push/pull the epoxy into the seam until I had a reasonable fillet. For taping, I pre-wetted the tape, draped it over a 2' stick, pushed it out to the ends and deposited it into the seam. Using the stick, I work the tape into the seam.

The taping and filleting were VERY messy. I went through a lot nitrile gloves and got a lot epoxy on my building table. Now that this stage is done, I need to do a good cleaning of the work area.

Because I was often up to my elbows (literally) in epoxy I took very few photos.  Those I did take are pretty crappy because I simply popped the camera inside the hull and snapped them off. The dark inside made it hard to take a good photo.

In my last post I wrote about bulkheads and their reinforcement. All my bulkheads are now filletted on both sides. Each bulkhead has one side taped with 3" tape for extra strength. That should be plenty strong.

Having finished this not-so-enjoyable step, I am now ready to glass the deck top. I'd much rather working above deck, than below!!

Looking fwd - compass recess in the foreground. Yes, there a few globs of epoxy but they are right out in the stern and this is the only time they'll ever be seen!.

Looking fwd in cockpit. Bulkhead will serve as foot brace. This is very blurry image - so don't be concerned that you're going blind!!

Looking aft - white lines are saw dust that has fallen in through stitch holes! They'll just brush away.

Fwd hatch. My arm could just reach to far side of compass recess - after that required a long stick.